
i’m so thankful for all you guys ♥
i’m so so happy you liked my master bedroom!
now stay tuned for more “fun” projects in this room
(ya know, like the crafty stuff 🙂
just wanted to pop into your day
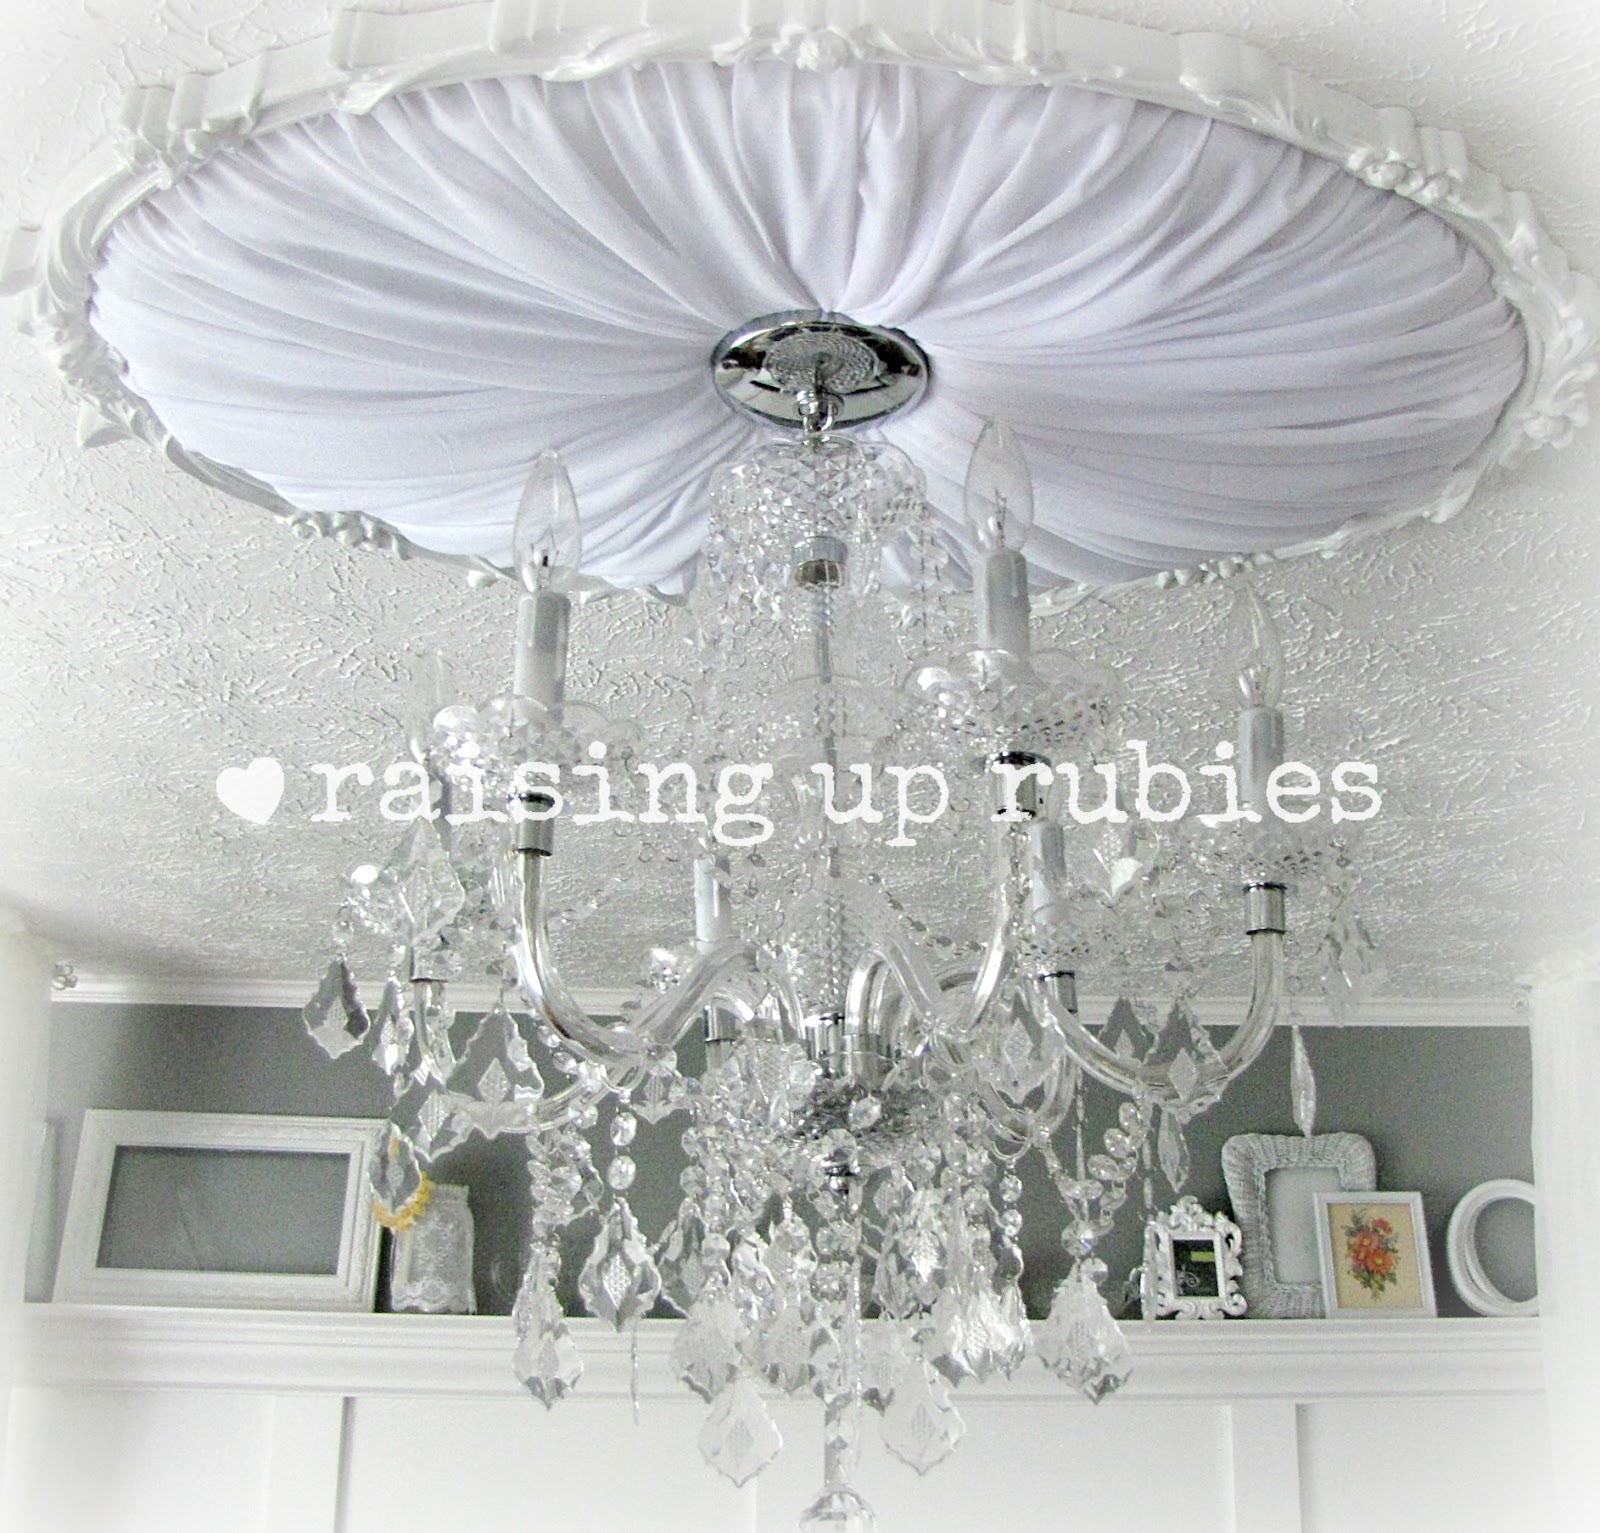
and tell you how i made the ceiling medallion for the chandy in my bedroom 🙂
it’s easy & cheap…and fun!

now bear with me on the crazy pictures…
i took them last year when we were in the middle of remodeling…well…a lot of stuff
it was before my craft space & big table were even a thought (can you even imagine? 🙂
the idea started with an old mirror my aunt gave to me…
then i broke it
then i held on to the frame for like…2 years
i knew i’d come up with somethin’ for it 🙂
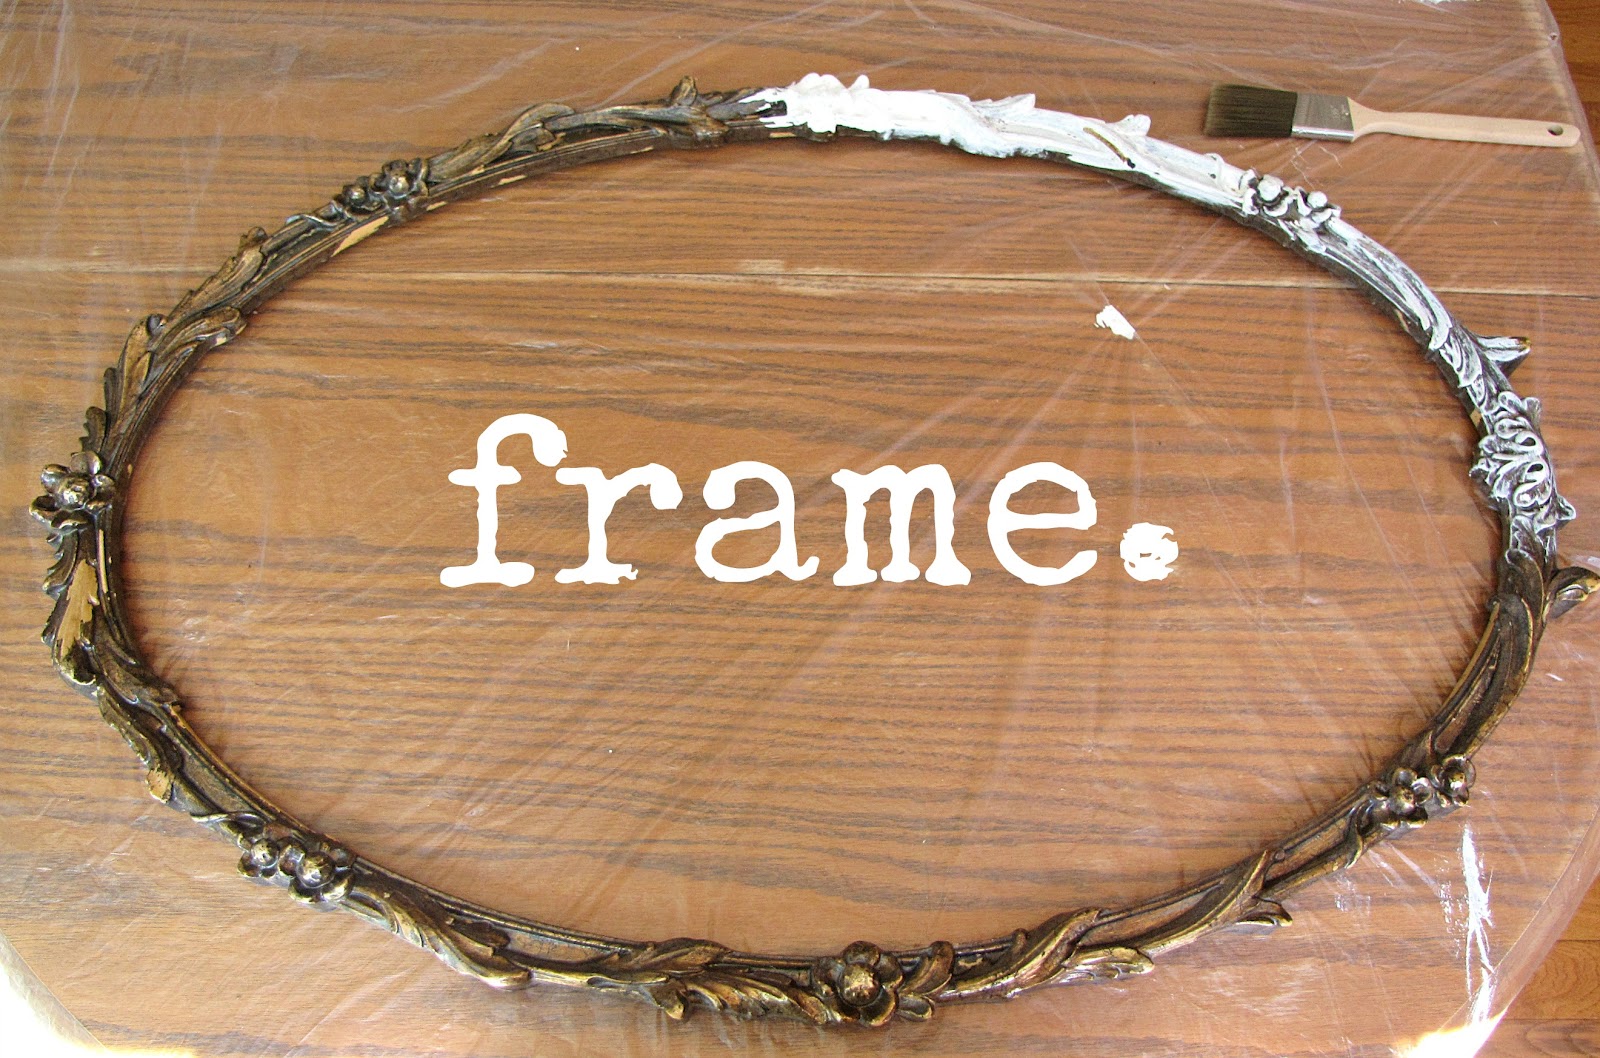
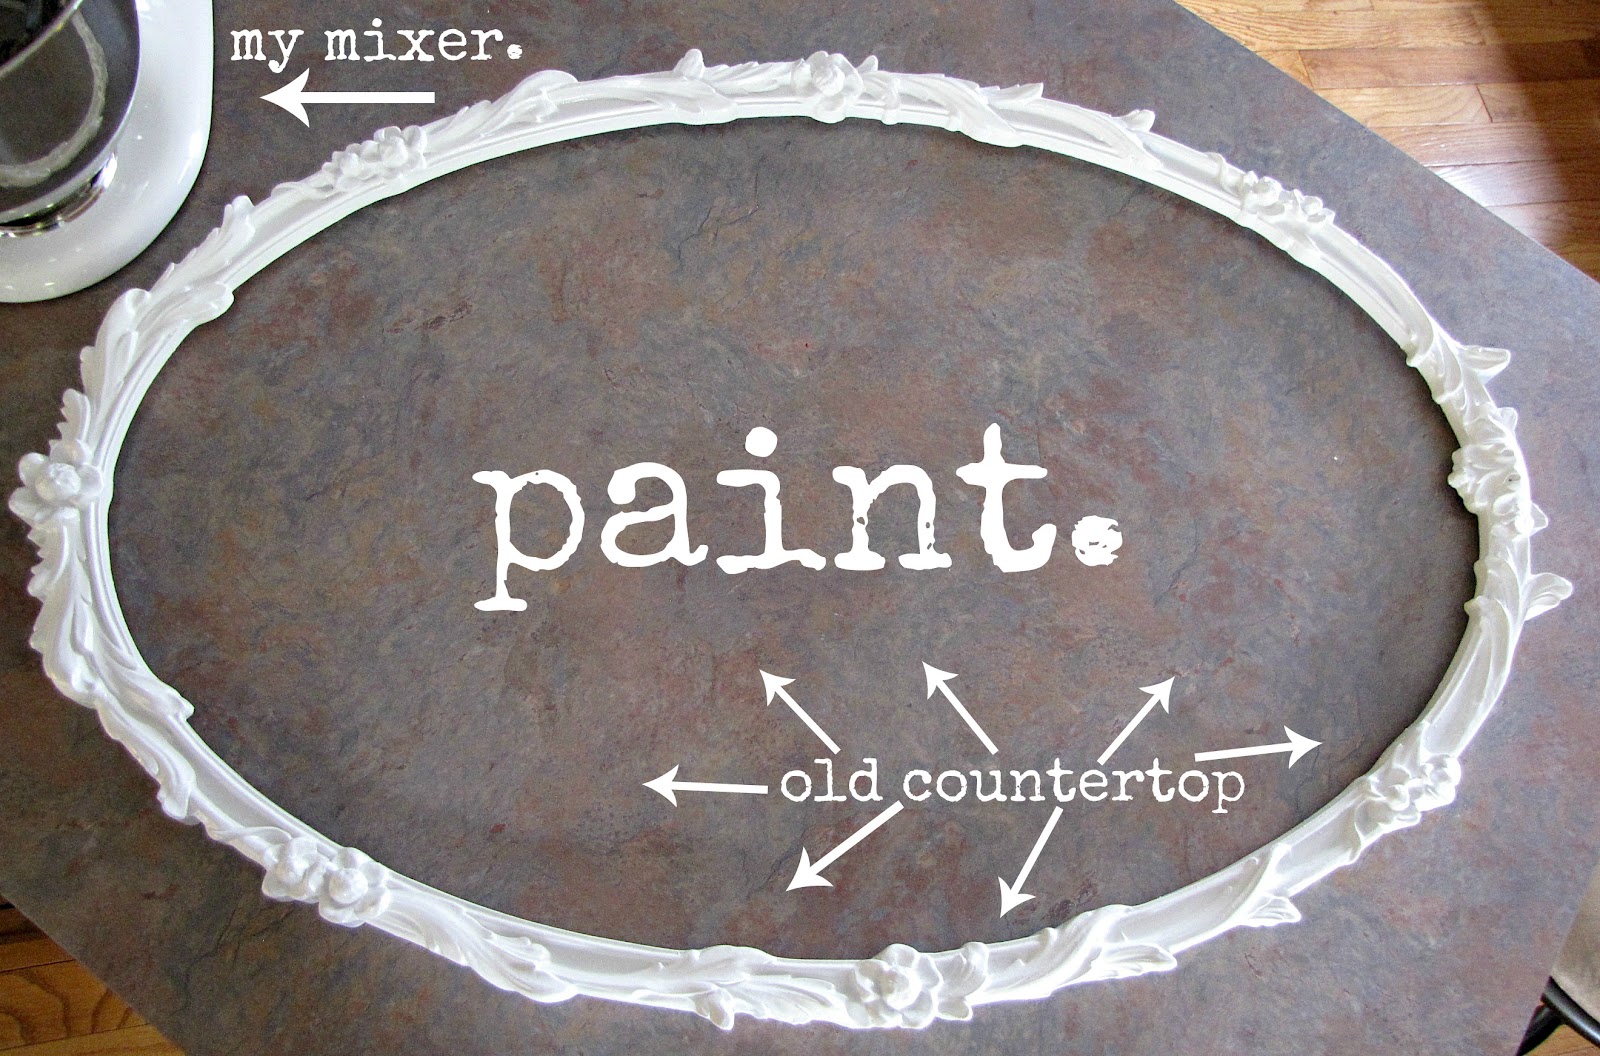
i started by painting it white ( i ♥ white)
(i paint almost everything white)
(much to my husband’s dismay..he’s a leave wood alone kinda guy)
(no fun!!)
it’s funny looking at these pictures…
we remodeled the kitchen last year…so they seem like so long ago

this is what the island looks like now ♥
(just had to show ya!…i’ll post more pics soon)
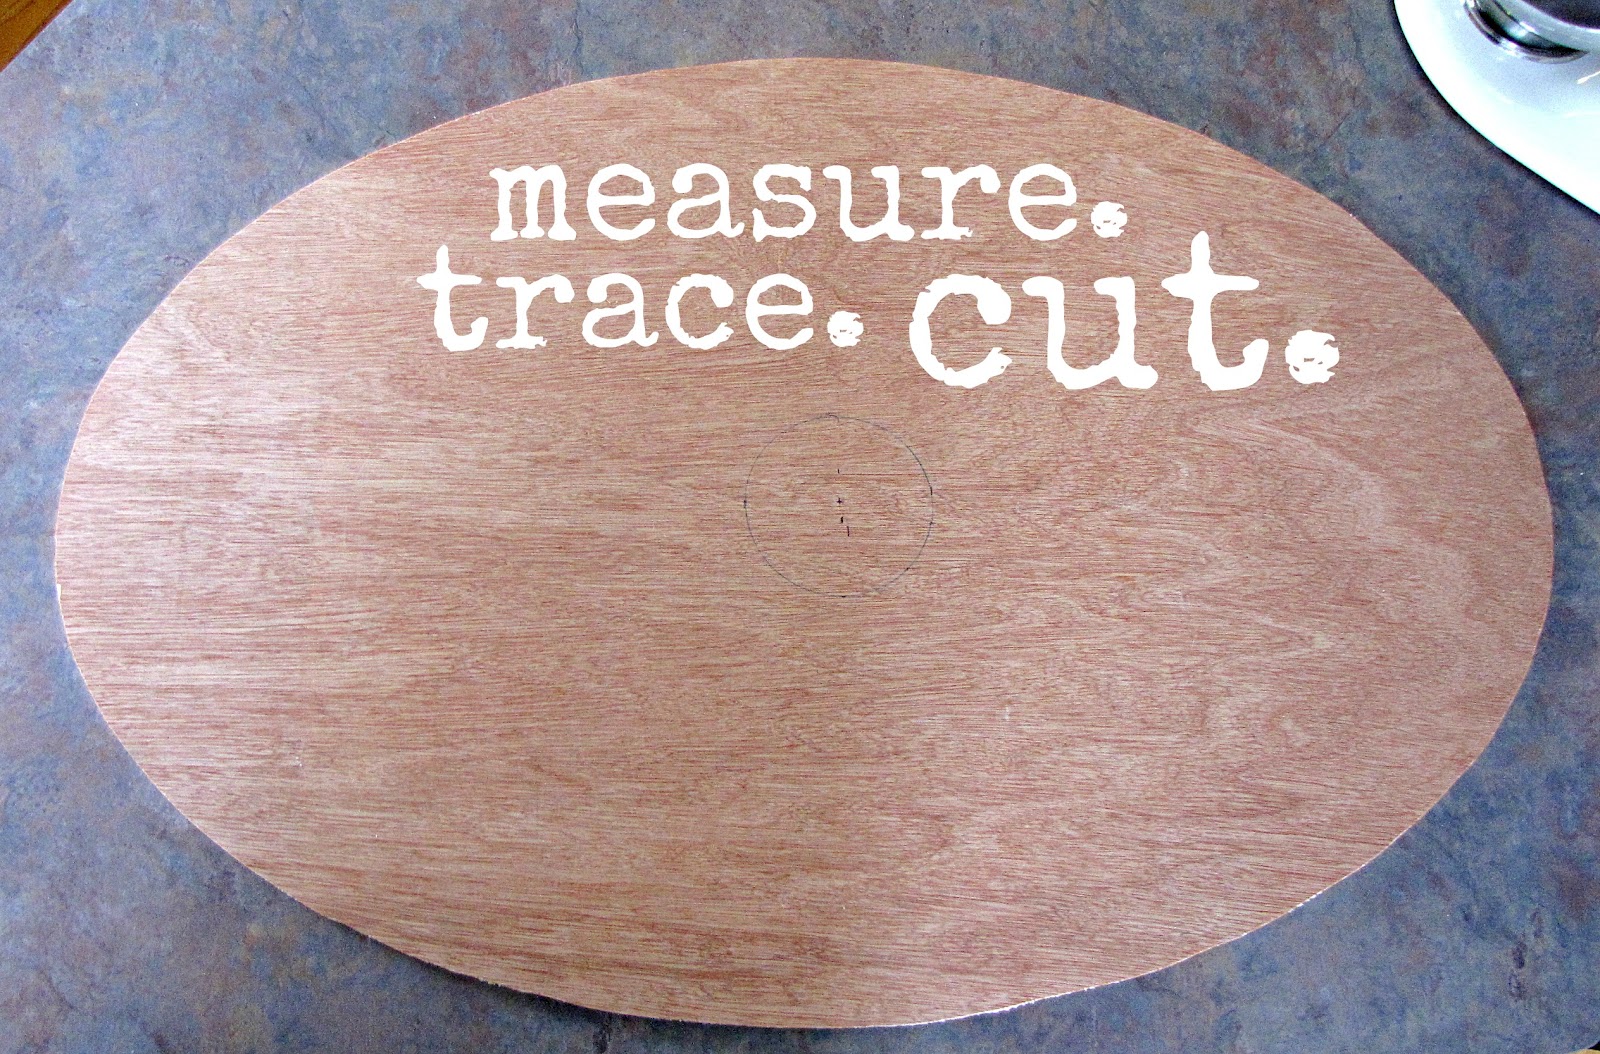
this is 1/4in. plywood
we laid the frame on a the whole sheet,
traced the inside of the frame to get this back piece
then measured and cut out the middle based on the size of the metal plate from the fixture
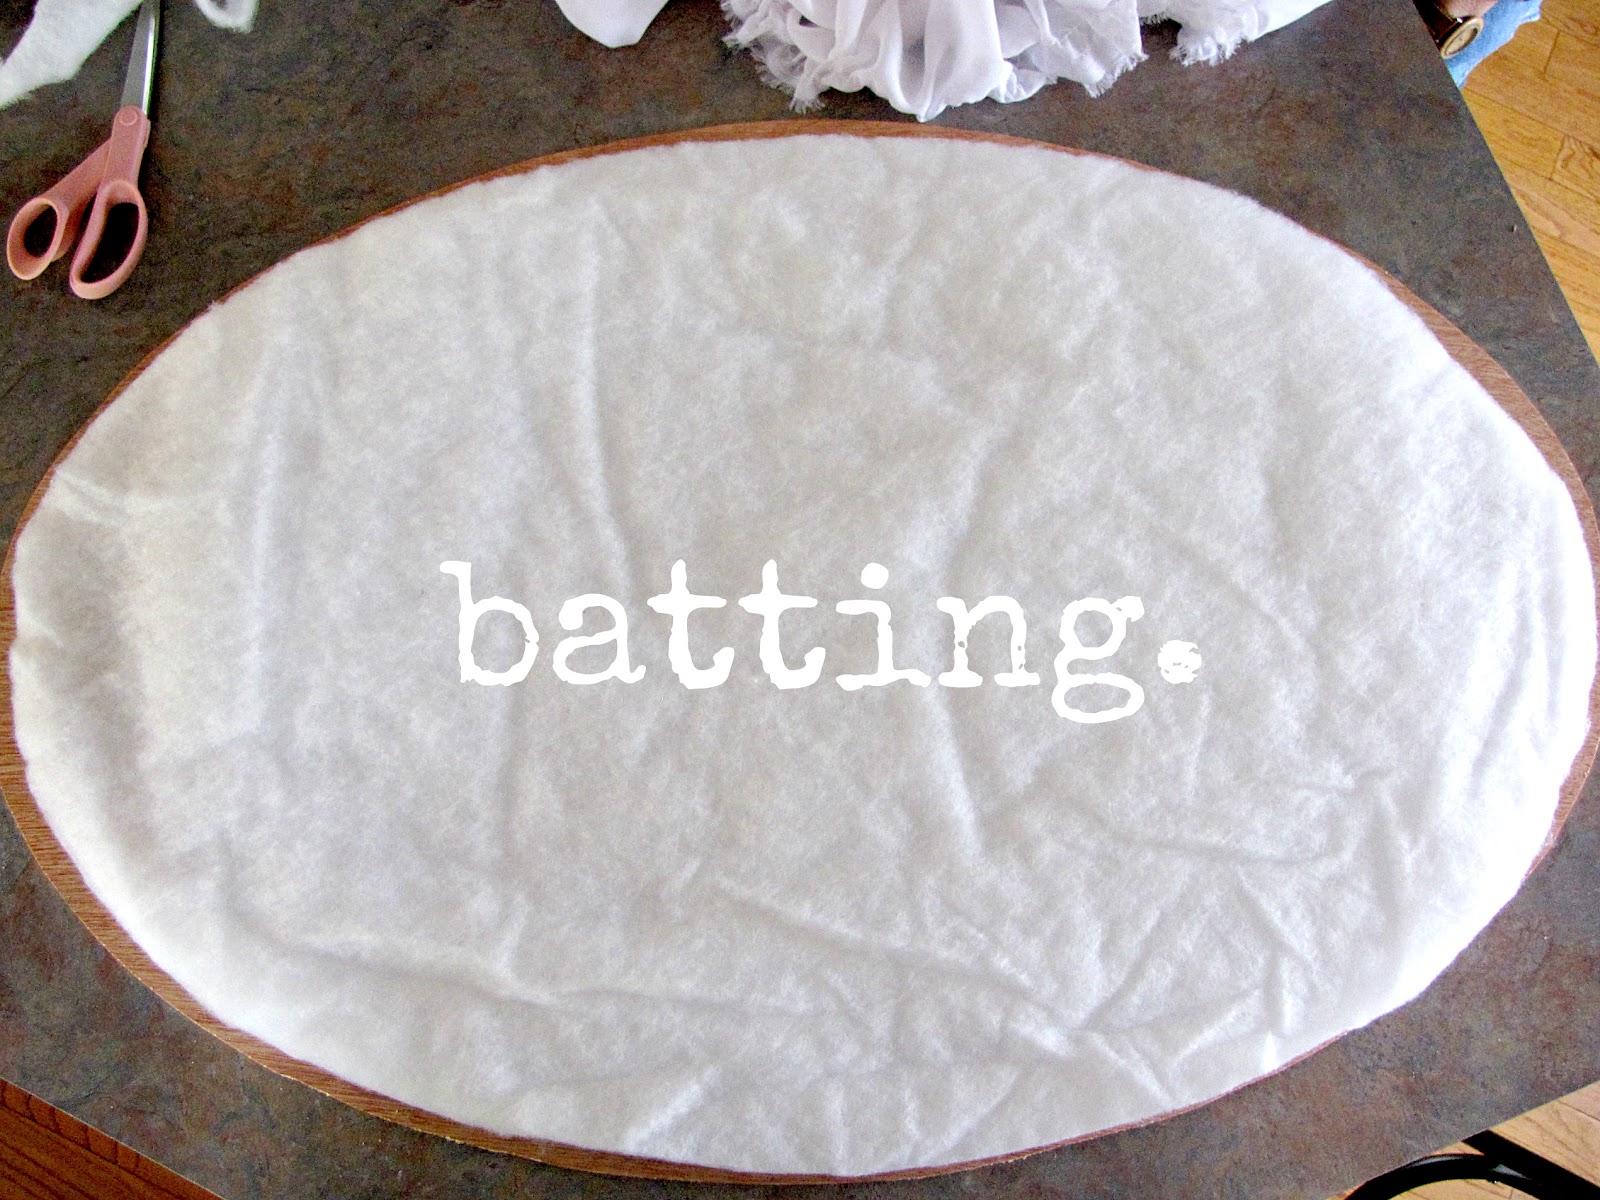
add as much or as little batting as your heart desires
i just wanted a little for fluffiness 🙂
i cut it the same shape as the plywood
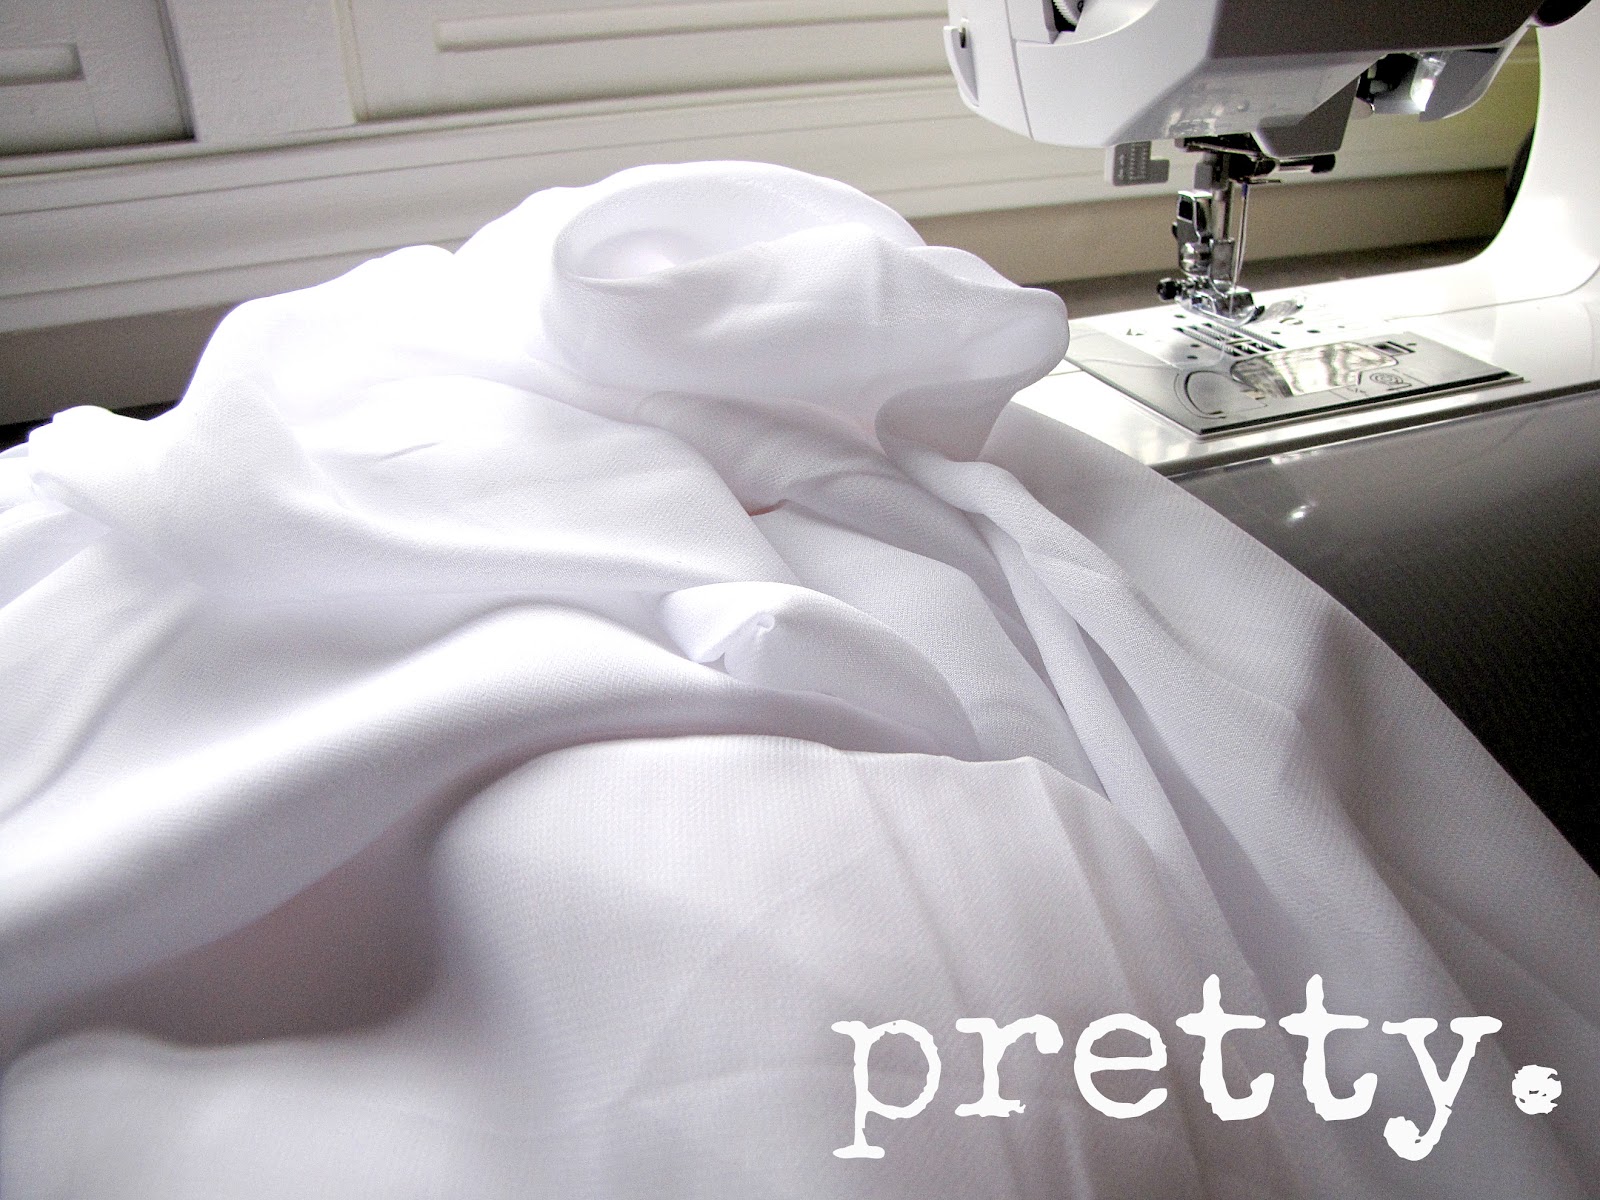
i don’t remember what this material was called
but it’s very slippery & hangs nicely…maybe a satin-ish something or other?
the yardage amount would also be based on the size of your frame
take one side of the fabric and lay it out around the outer edge of the plywood & batting
to see how much you would need to ruffle…
then whatever the measurement is, double it for a full ruffle
if you want it fuller and tighter do double and then some
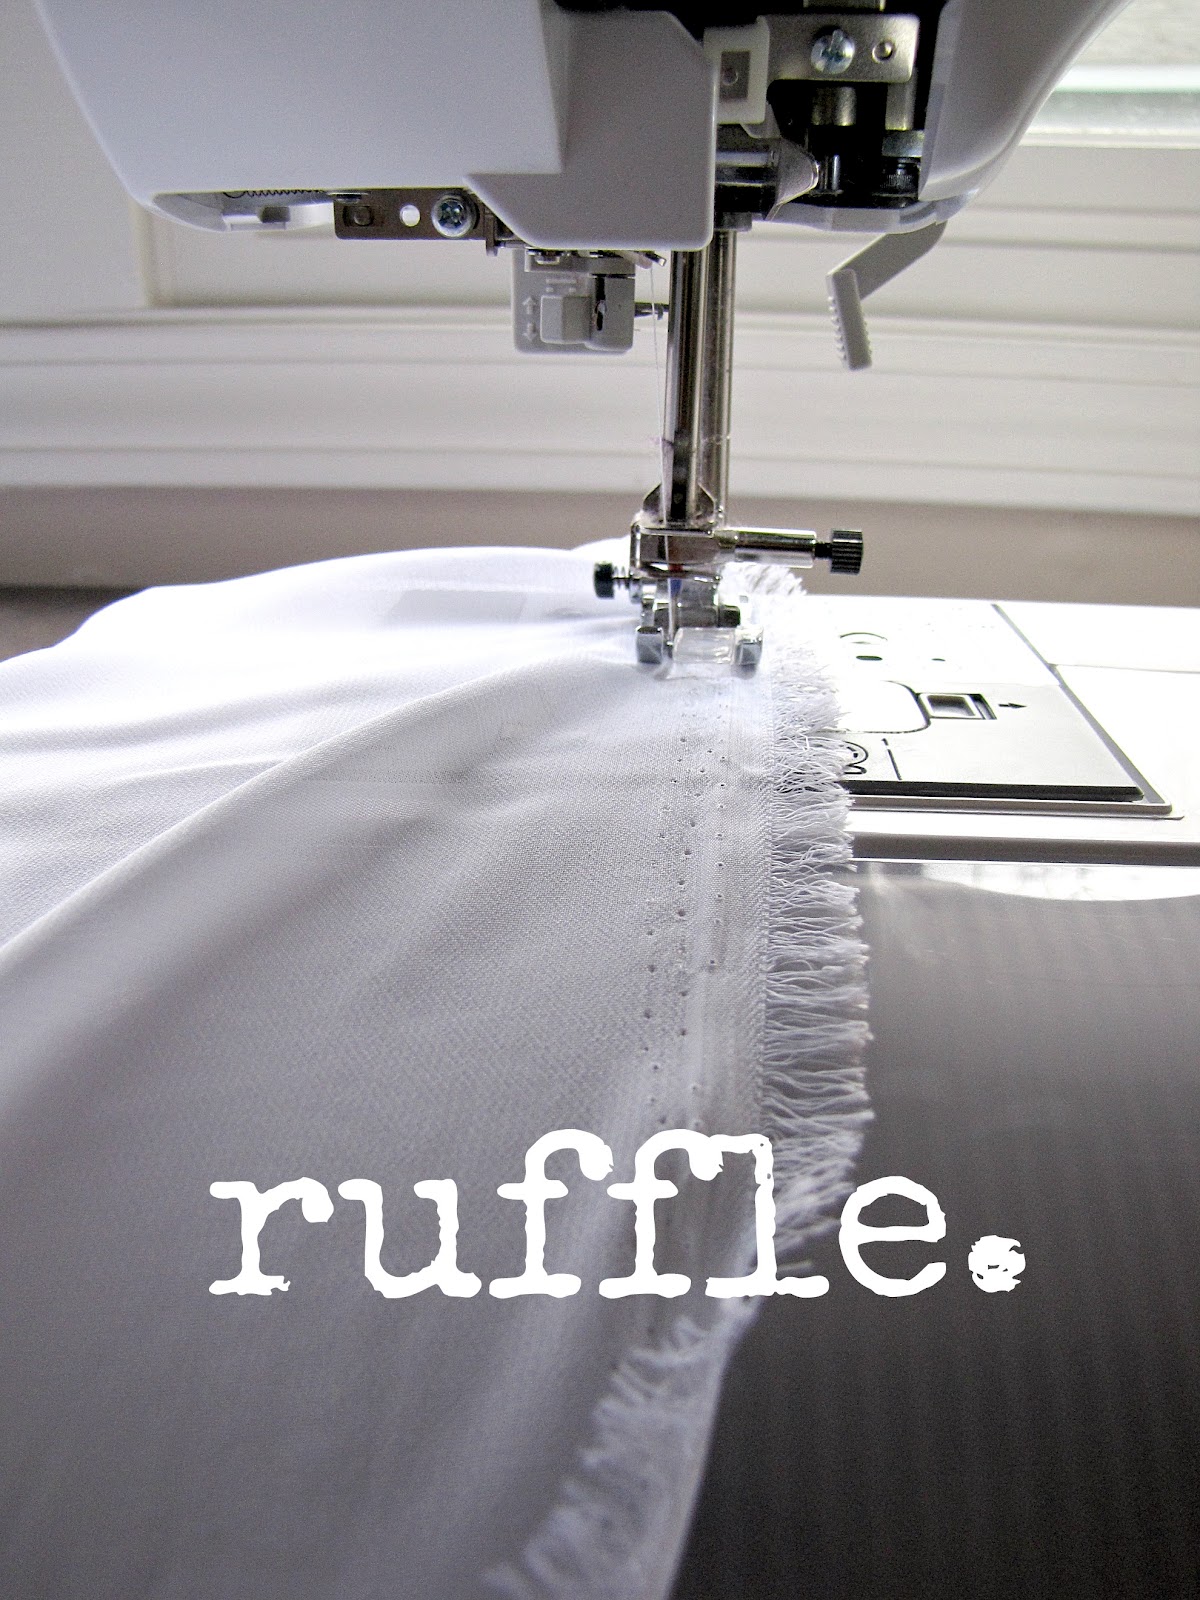
so this is kinda what you should have goin’ on
again…with it ruffled now…lay it out around that outer edge
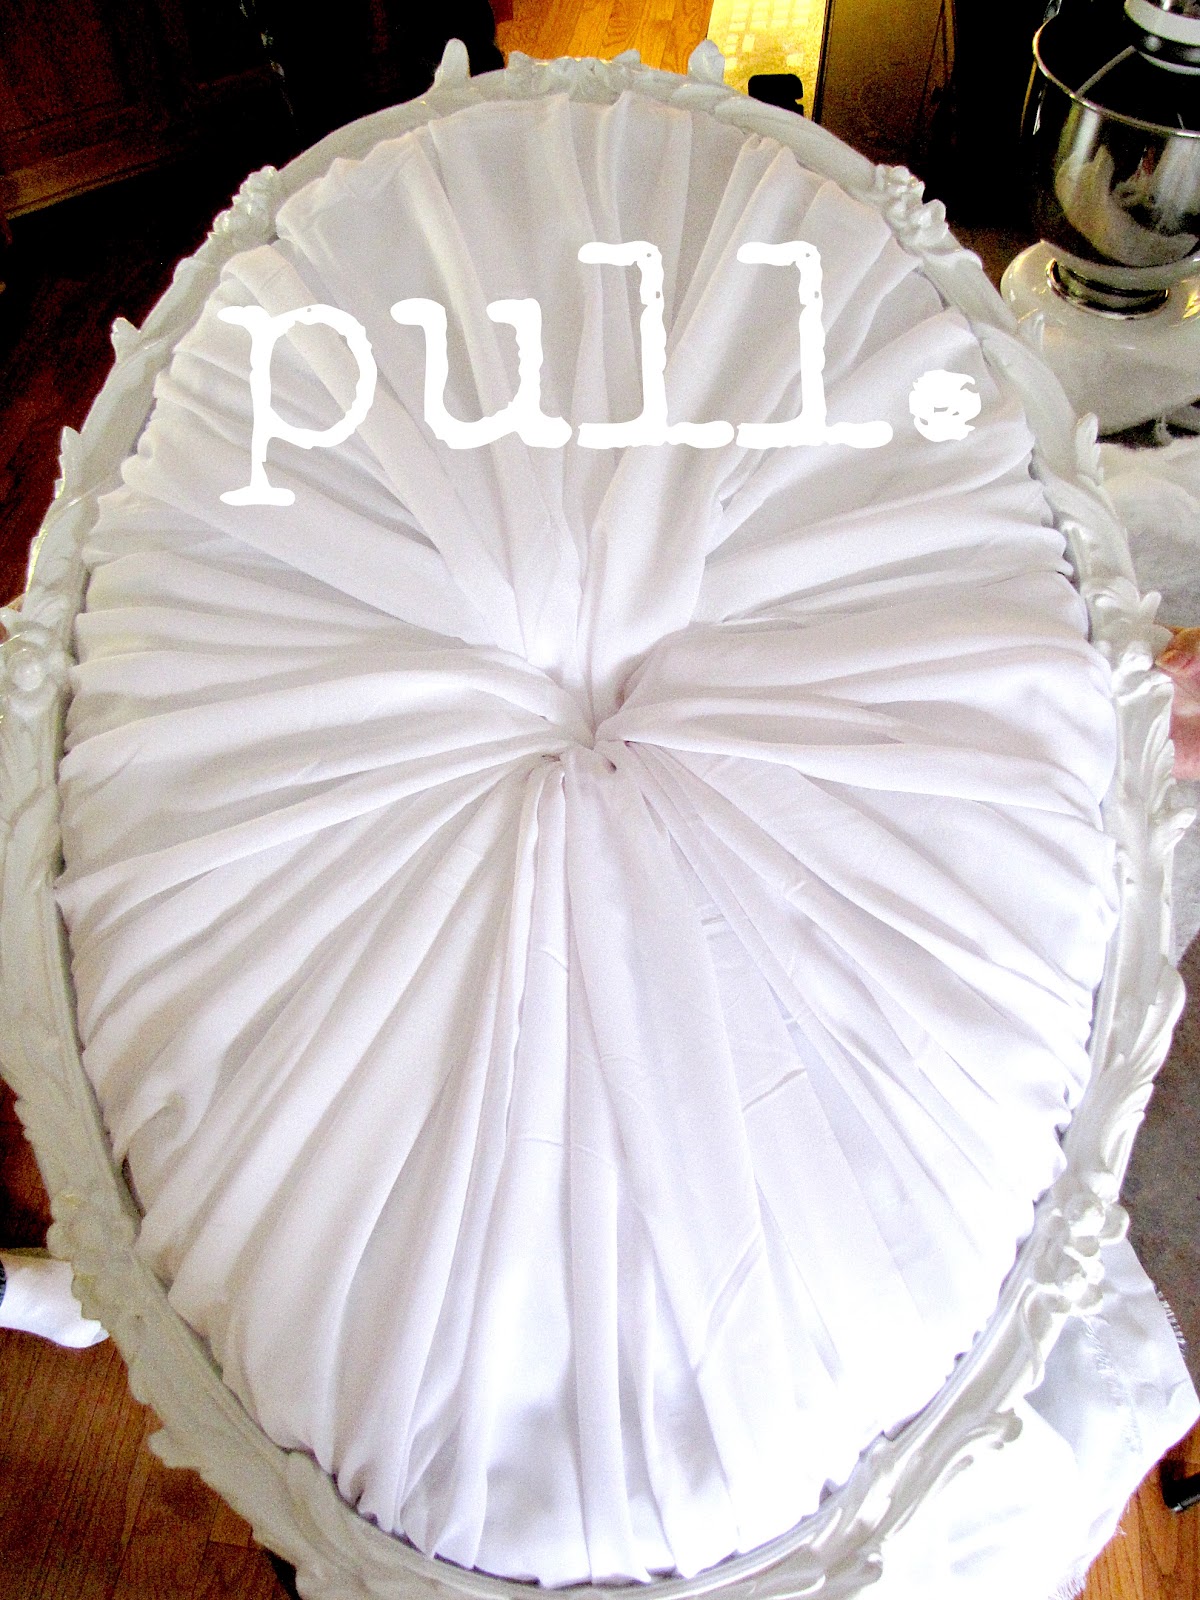
you’ll have a huge pile of excess in the middle
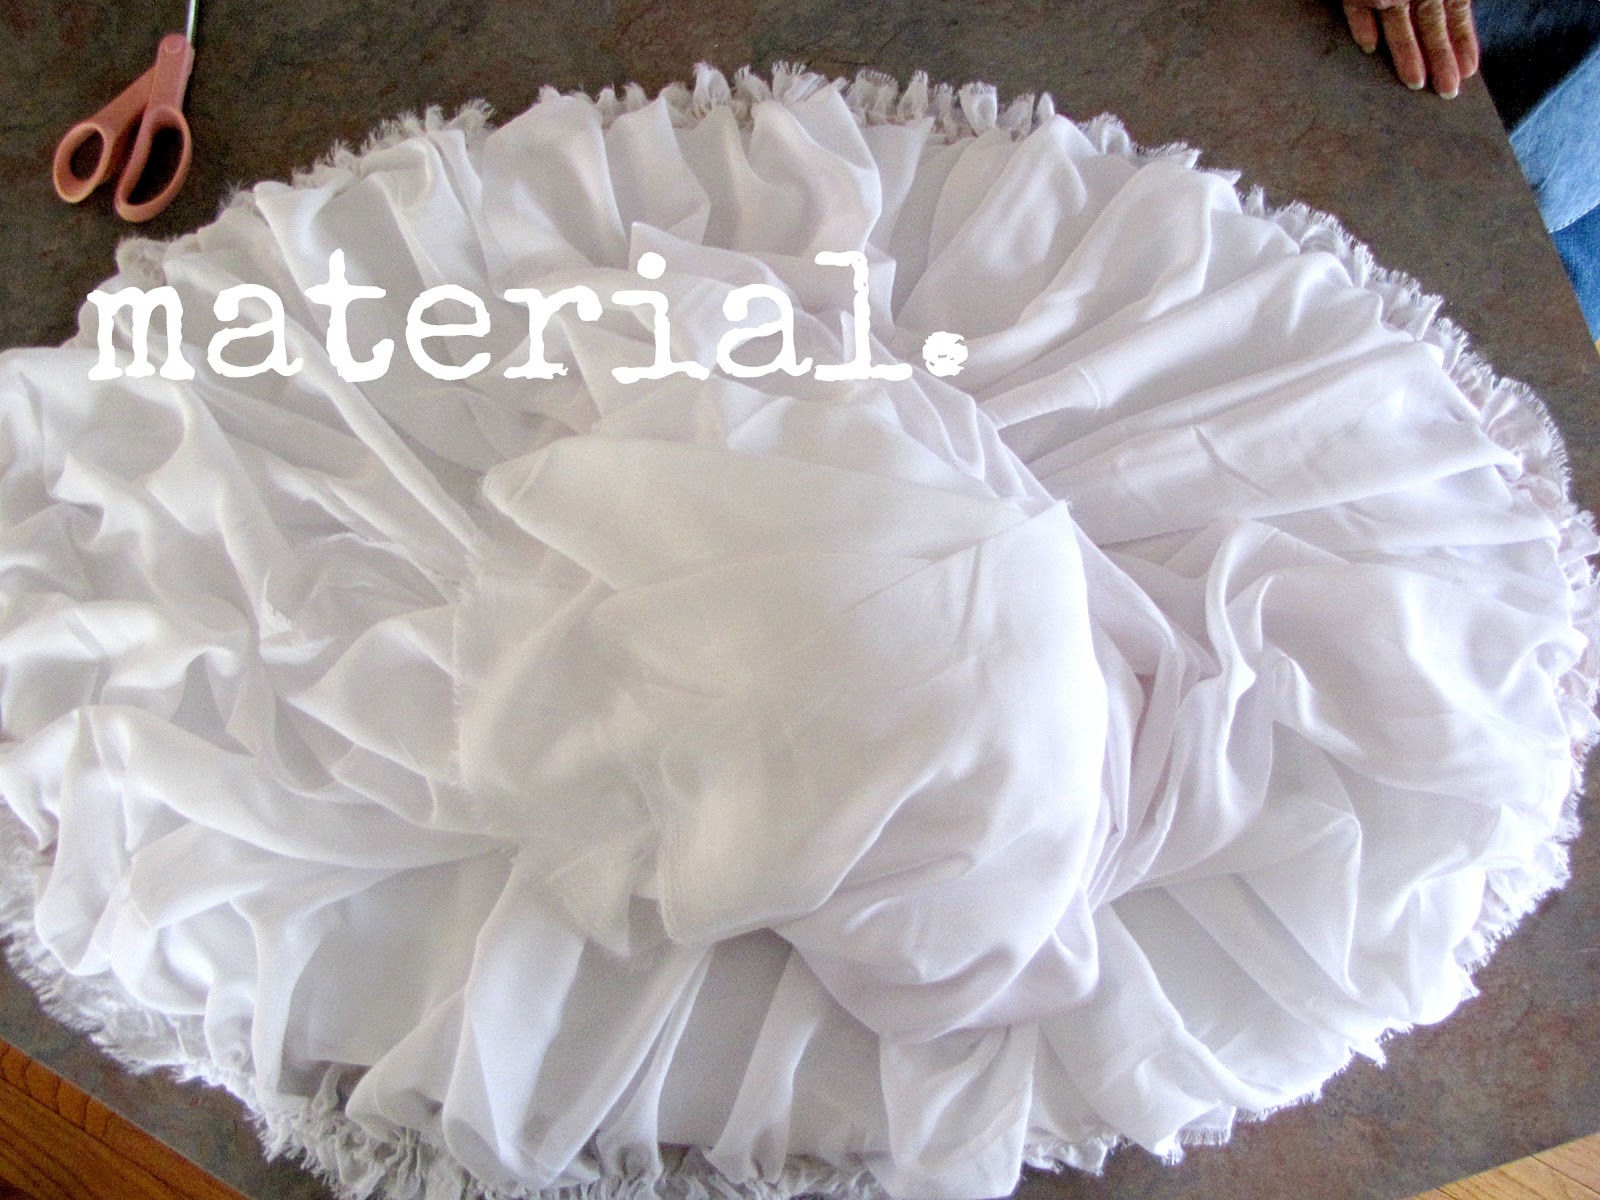
put your frame back on top
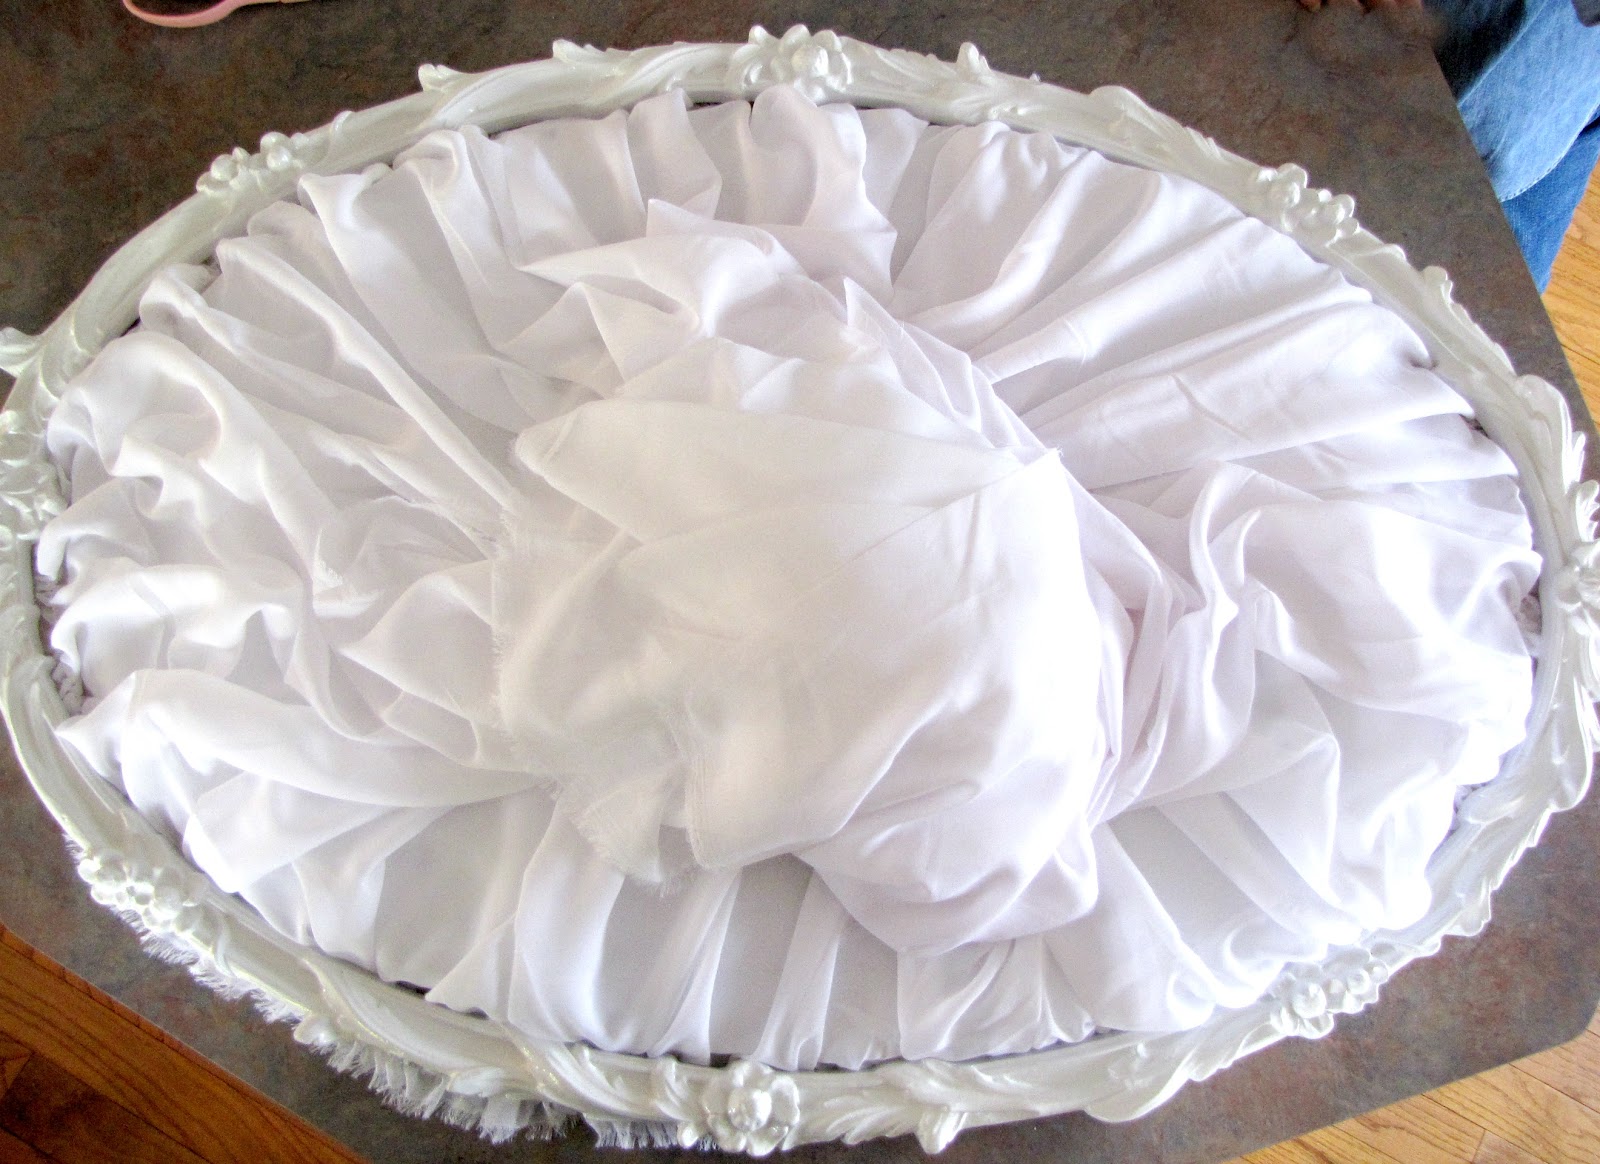
flip the whole thing over
(it helps to have some extra hands here…trying to keep the layout of the fabric in tact)
staple that outer edge onto the back of the plywood…
(this picture is a few steps ahead, but just to give you an idea)
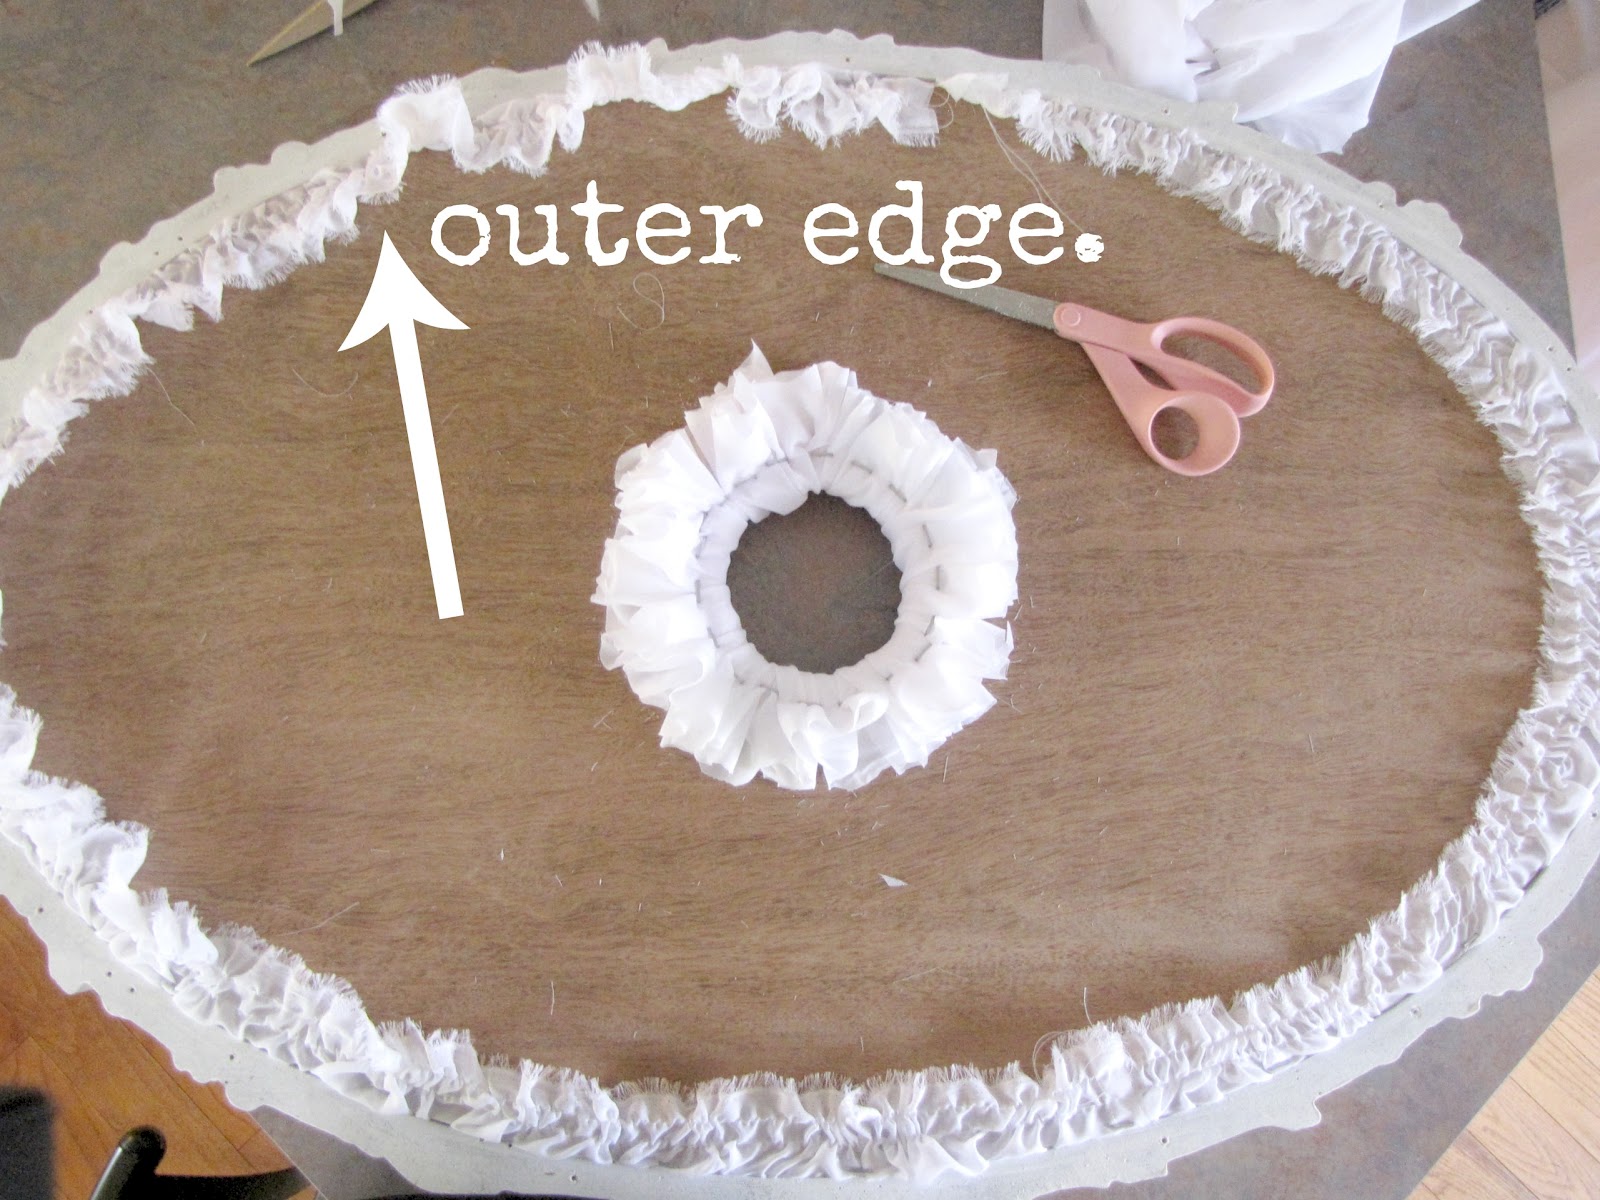
once the outer edge is secure, bring the excess through the middle
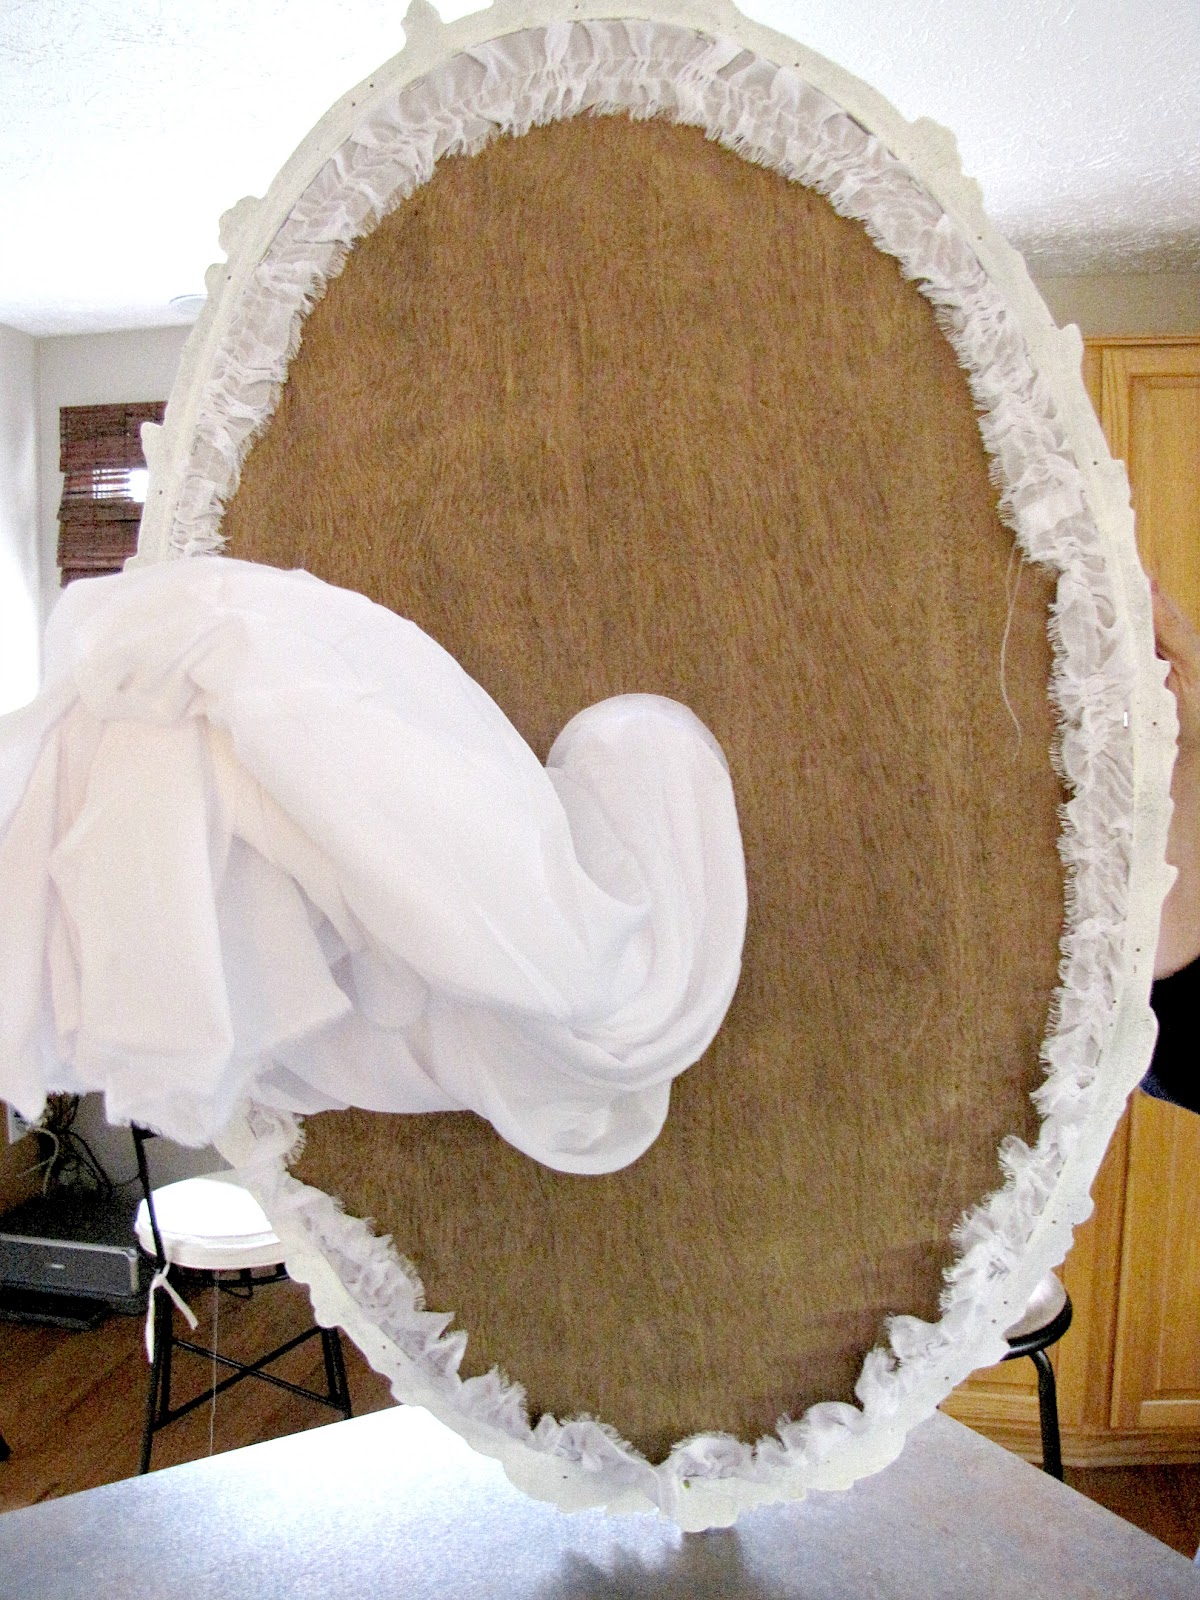
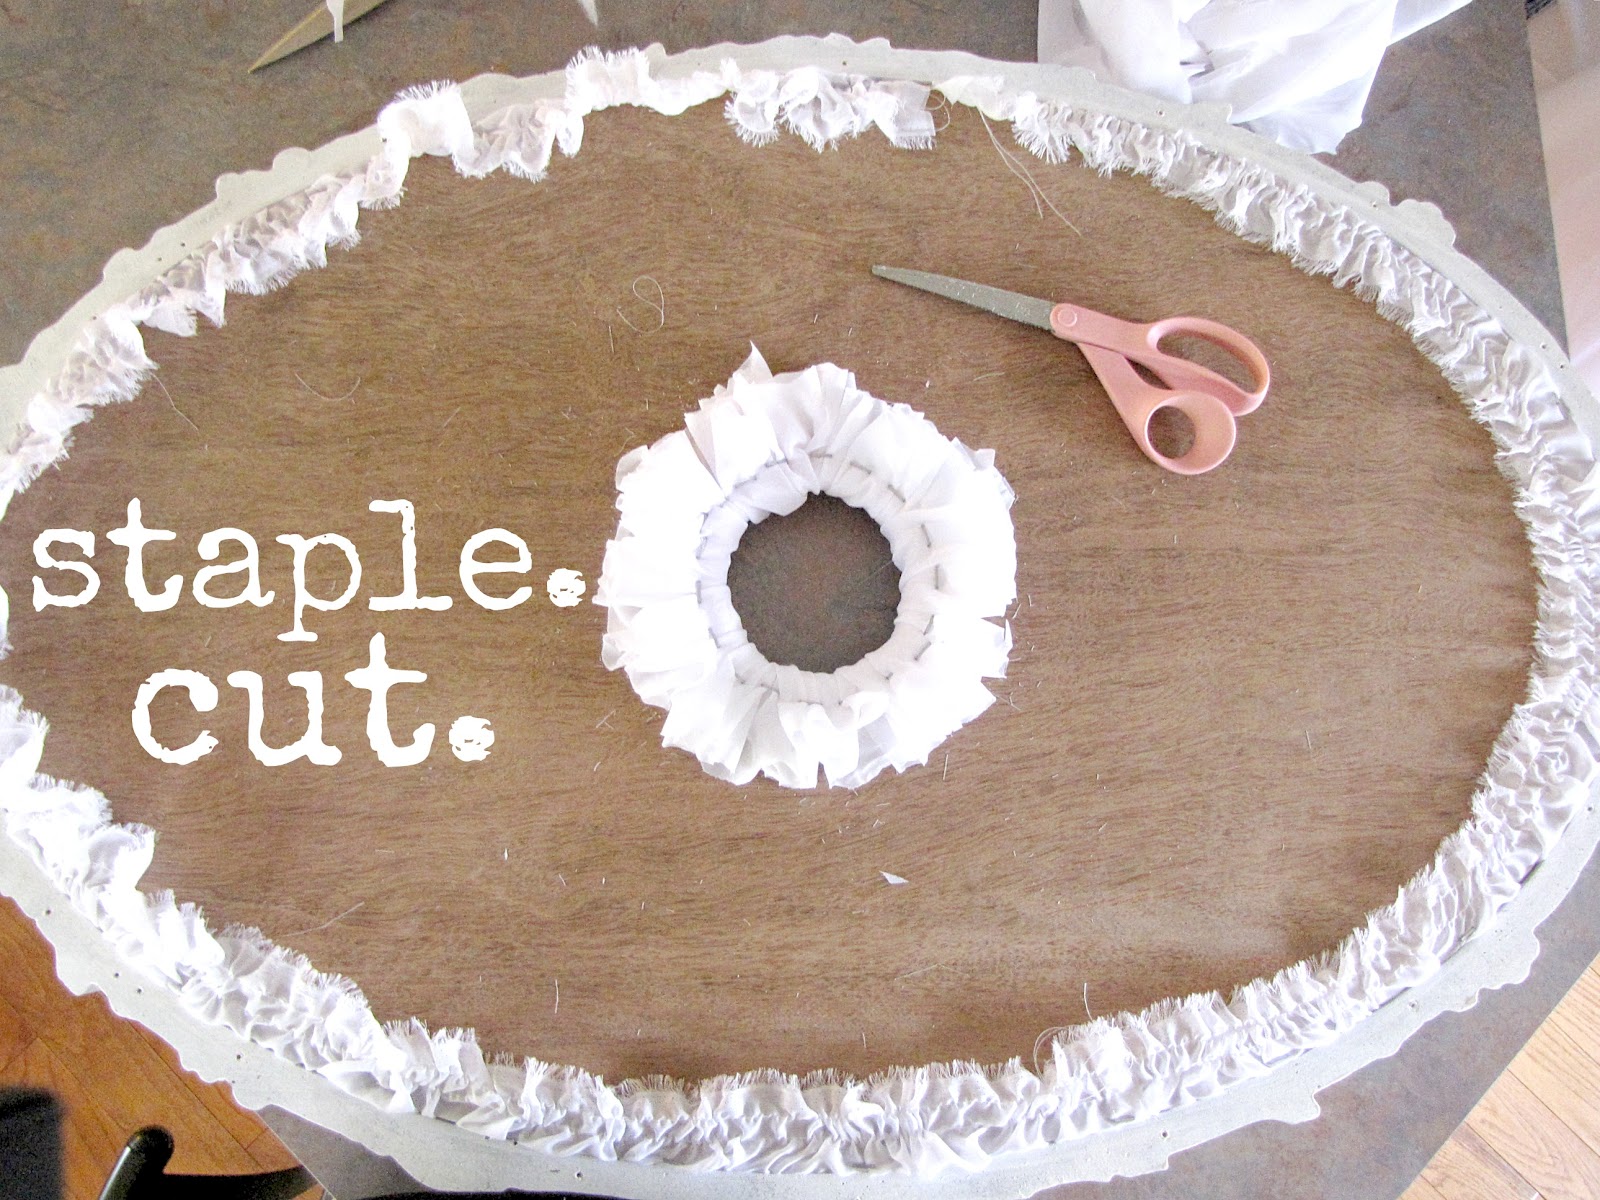
pretty easy right? the plywood should fit into the frame nice and snug with all the extra padding…
my hubby connected the fixture with the wiring in the ceiling and secured the frame with small nails from a nail gun into the ceiling (into studs 🙂
(he’s obsessed with putting stuff in studs)
(why? i have no idea…it’s just a light hanging over our heads at night…no big deal)
i get excited thinking about doing this with even small size frames for any hanging light fixtures
lot’s of possibilities!
i hope this was easy to understand…if there are any questions…please ask!
much loves

sweet parties…♥

This is beautiful!!!
LikeLike
Jame… I just love you. So glad your blog dream is coming true. I love reading it and stalk it every. single. day. to see if you posted. Love the chandelier.. but you already knew that! 🙂 xoxo kisses.
LikeLike
Wowwee!! That is gorgeous! So romantic and I just love the texture of the fixture, silver and fabric.<3 Christinahttp://igottacreate.blogspot.comWildly Original Round Up party is open!
LikeLike
This is so lovely, what an awesome use for an old frame! Thanks for sharing the details & how to's!
LikeLike
This is so fun! Love how it turned out! Have a great weekend! XO
LikeLike
Such a lovely idea. It's gorgeous! I also love the chandelier. I'm looking for something similar for my daughters room. Where did you find it?
LikeLike
hi Kris ♥thank you…i'm glad you like it! the chandy is from Home Depot 🙂
LikeLike
This comment has been removed by the author.
LikeLike
HiI was wondering if I could use cardboard box material instead of plywood?
LikeLike
What kind of paint did you use?
LikeLike