Uncategorized

diy pennant bunting & a summer front porch …♥


as i work my way through fixing up our house, i’m slowly discovering my decorating style
and slowly discovering what works & feels best for our family
and realizing it’s not about perfection, it’s about using what you have
to make it an inviting & welcoming place to live 
i’ve always dreamed of having a wrap-around front porch with a swing and a pretty 
spindle-ish wood screen door … so even though our front porch is small, 
it’s still fun to spruce it up a bit for summer
sometimes i sit and watch the kids play (they usually don’t know i’m sitting there)
or i read there in the morning, after the bus leaves 
(unless it’s raining) 
(or if it’s too hot)
 (we don’t have consistent weather here … at all)
but it’s quiet, and peaceful


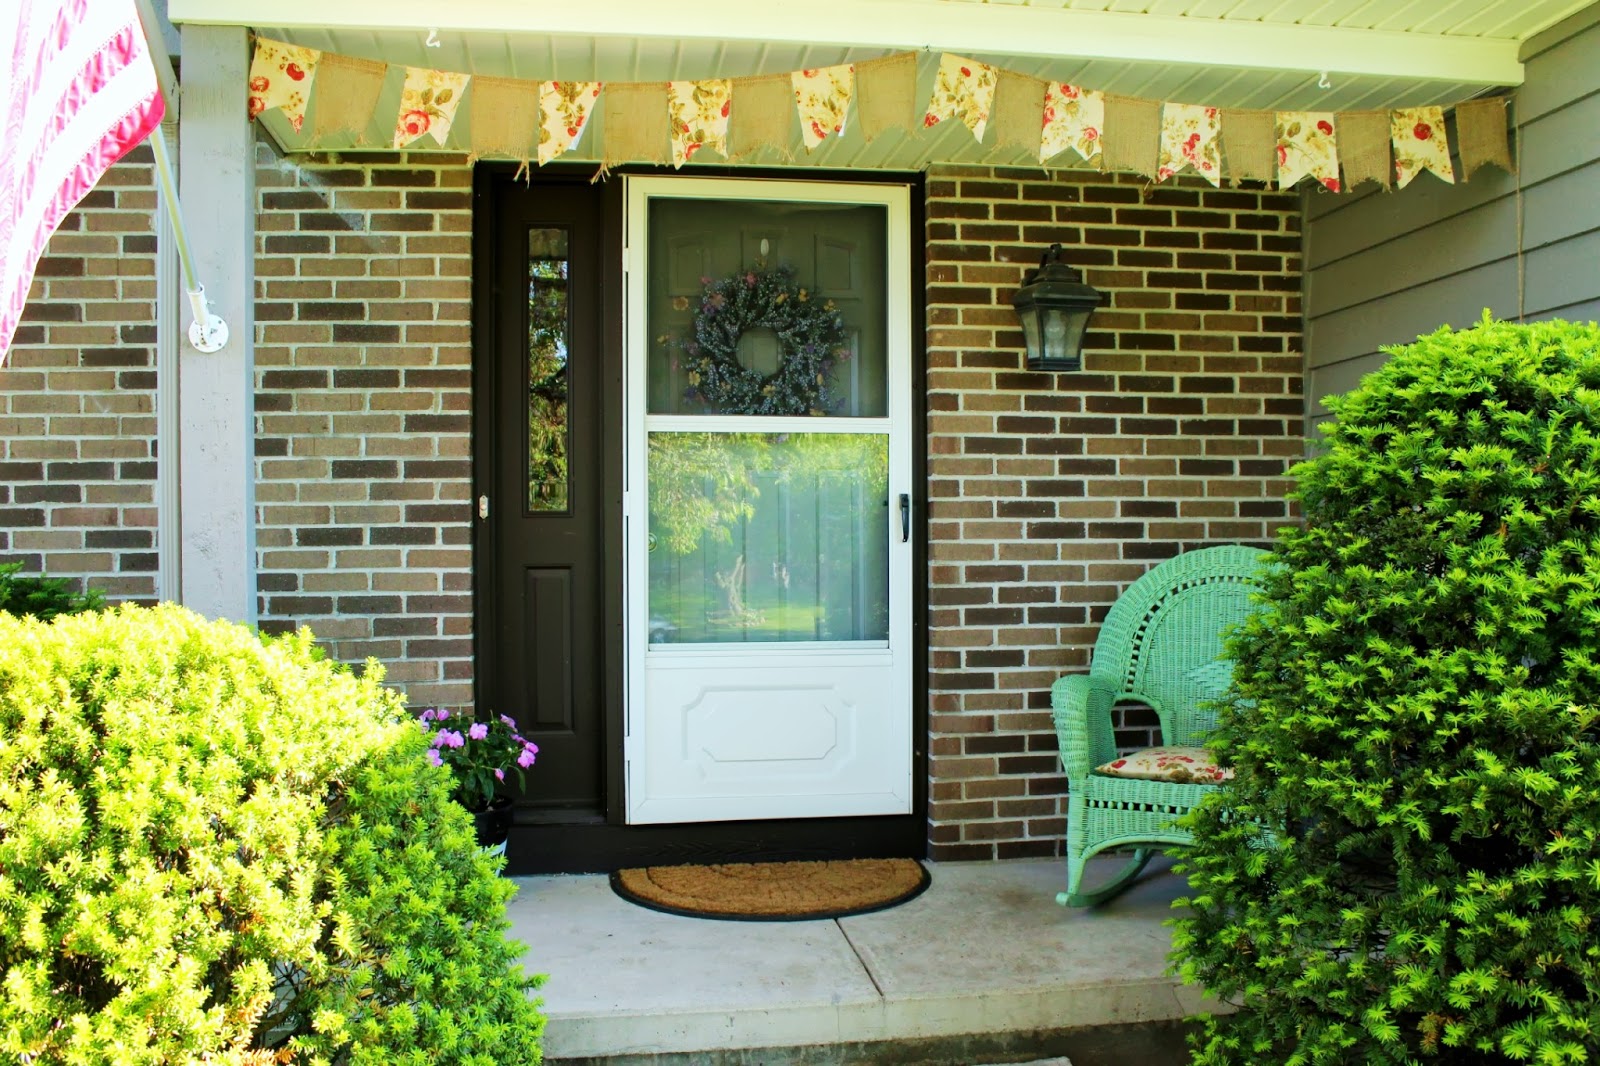
the bunting was an easy project … just cut the pieces to size, sew a pocket and thread some jute through the pocket … or hot glue directly to the jute


this rocker was on the curb one night before garbage day … a long time ago
i love it, it’s my favorite. i’ve painted it lots of different colors
this year it got the mint green treatment 🙂


i hope to find some odds & ends to add to this little wall near the rocker
maybe a mini side table too … the welcome sign was actually a mirror


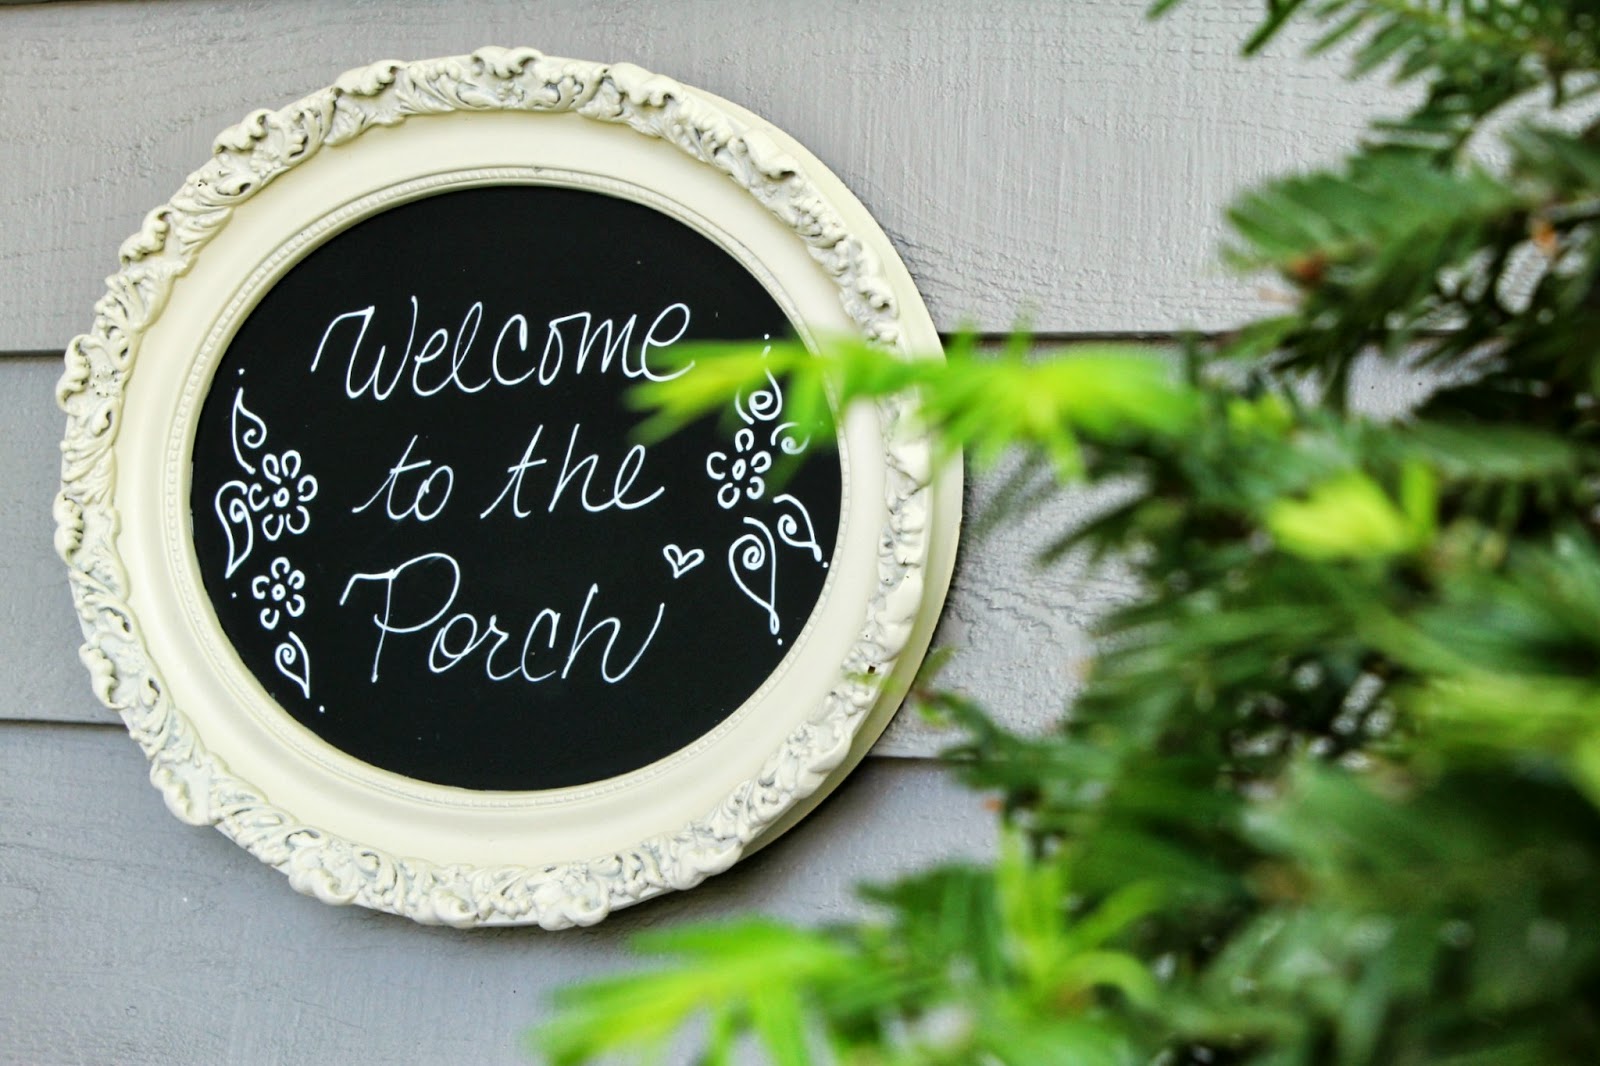
with some chalkboard spray paint to cover the mirror
and some almond colored paint around the frame …


it takes on a whole different look
welcome to the porch! 🙂


the azalea’s are in full bloom this week
that means summer is almost here


the girls will cut a few branches off every couple of days
and put them in a vase near the kitchen window for me 🙂


well tomorow’s friday! that means yard sales! fun fun fun 🙂
be back soon with some info on my coupon system…
happy weekend 

linking up here:
Uncategorized

pretty plate display … ♥


happy Friday!
some of you have wanted to know more about the plates hanging in the kitchen/office area
how i hung them & where to find them
so i thought i’d show you a few close-ups!


i stumbled across this on Pinterest 
Christina from the Frugal Homemaker uses some felt & hot glue to hang her plates!
that’s it! no fancy gizmos!

plate hangar from paperclip

i have to be honest about this…
there was much discussion between the hubs & me about this method of 
hanging stuff over tile counters 
that he painstakingly installed not that long ago 🙂

but it really works! … 
the hot glue really melts and welds the paper clip to the felt
 since it’s so fiber-ish
(know that’s not a word)
(but this is my blog … m’kay?)

they’ve been hanging for a few months now …
every so often i’ll peek to see if the clips are sliding out from under the felt…
nope! they’re cemented on!
we’re good 🙂

i have to admit …
i have a problem with plates
vintage plates to be specific
i love them, and have too many of them
(cept that mint one with the butterfly … that’s from TJ Maxx 🙂


i found most of these at yard/rummage sales, and the thrift stores
(some were given to me by family)


it’s almost yard sale season around here …
my favorite time of the year 
🙂 


here’s a few other displays i fell in love with from around the web …


{Canadian House & Home}


cassandras dining room after 18
{Addicted 2 Decorating}


{Domestic Fashionista}


i hope this inspires you to find a blank wall in your home
bust out your glue gun & felt … and hang some plates!
have a wonderful weekend!
much love ♥
linking up to some sweet parties…

Uncategorized

pretty diy decoupaged drawers … ♥


if you follow me on Instagram  (raisinguprubies)
you might remember these drawers i covered in paper!
they are the drawers that live in my vanity in our master bedroom


you can see the full post over at Everything Etsy
take a peek, they turned out so fun!
a tour of my master bedroom is here

i have a few things left in this room to check off my list …
one of them was covering these drawers in the vanity 
as well as the drawers in my dresser
and they’re almost done!

with gladness in my ♥
Uncategorized

simplify ♥ your kitchen …


i’m was so excited to see the spice jar project inspire you guys! 
thanks so much for all the sweet comments ♥
throughout the next few months (or maybe even the rest of the year 🙂 i want to share some of the projects i’ll be tackling, to whip a few problem areas in our home into shape! 
making them more organized and tidy, while helping us incorporate easier clean-up into our daily routine

i made a list … it’s really long … ridiculously long :/
i went room by room and started in the kitchen
the spice-mess is done, now moving on to other parts of the kitchen which i would like to work on this week, while trying to squeeze a bit of crafting in here & there 🙂

inspired by one of my go-to blogs i {heart} organizing along with a few fun things i found at Target last week, (which were either in the dollar bins or on clearance) i decided to start operation-simplify-my-kitchen … 
yay! right??!


♥ the place mats are for the shelves inside the fridge
♥ the glass containers have a pretty teal top (glass as well) that i want to use for an organizing project on another day
♥ the wrapping paper was used in the spice drawer and will get used in a few other drawers too
♥ i already had the gingham canning jars … found them at Walmart a few summers ago … 
but don’t think they sell them anymore, i looked everywhere … boo 😦
those are for another space as well
♥ and my favorite find was the red wire basket in the dollar spot 🙂

i started my organizing frenzy in the fridge … take a peek inside!


the place-mats make for an easy clean-up … instead of taking the whole shelf out to wash, wiping down or washing the mats in hot water is much easier … it’s all about easy when it comes to cleaning for me 🙂


measure and cut straight lines, and they fit right in


this top shelf sees a lot of spill action from juice & coffee creamers 
(ahem … my hubby has a little coffee problem … he likes a little coffee with his creamer 🙂
(well no really, the coconut is mine)


these “pull out” fridge baskets are perfect for yogurt & lunch packing goodies
the girls can pull them out in the morning and choose snacks, fruit and veggies to put in their lunch … it makes it fun for them, and less stressful for our morning when were in a hurry to get on the bus 
(which happens like never)


i’m hoping to make this habit one that sticks 🙂 
coming home with the groceries, washing and pre-portioning fruit, veggies and any other items for lunches and snacks that same day … it makes everything easier when the 
“what should i have for snack” or “how many can i have” 
questions come up 
the mini muffins get put in the freezer to be pulled out and thawed the night before for a quick on the go breakfast before a busy school day or on our way to church 🙂


canning jars are my go to storage containers
they hold the smaller things in the fridge that you want to keep together …
use a label maker or just some pretty paper with double sided tape to describe the contents of each basket


i like to pinch a few pennies and buy the large tub of yogurt
then just divide it up into small lunch size containers


i think the fruit is happy too 🙂 … with it’s pretty new drawer liner


my favorite part of this whole thing? that wire basket from the $1 spot at Target that fit nicely on the door … and now the eggs have a new home 
 a cute one to boot 🙂


next up! i’m moving on to my food & housewares drawers …
and a cute little way to add some color to your kitchen with pretty things that are hiding in your pantry 
(and you don’t even know it 🙂

much loves! ♥
Linking up to …
Uncategorized

chalkboard spice jars … ♥

i’ve been bitten by the organize your life bug
🙂
i love when it’s a new year
cause it’s reason to start fresh & throw junk out
i feel like my word for this year is 
simplify
not that that’s official or anything
well maybe it is since i just typed it?
i yearn for simple
i yearn for peaceful
a more organized home
so that my time is spent with my family
spent doing things i love to do

and not spent looking for the paprika
which i need for the dinner i’m making right now that’s burning on the stove cause my spices are a heaping mess in the pantry then all fall out of the bucket cause i’m looking for the paprika which happens to be at the bottom of this bottomless bucket of spices other expired things
really … you think i kid
i do not.


this is what we’re starting this project with … a few buckets of heaping confusion
everything looks like paprika when you’re in a rush to find it
(what is paprika anyway? does it really do anything??)
(besides make things red?)
to get this act together i used half-pint mason jars
spray paint the lids with Krylon chalkboard paint (joanns)
and i painted the rings with Rustoleum 2X coverage in aqua
(not a necessary step in the whole organizing process)
(necessary step for cuteness factor process)
(plus it matches the polka dots in my drawer liner paper)
…. and! some polka dot wrapping paper (Target)

what’s the best place for spices in your kitchen? 
i wanted to move them to a half empty drawer that really wasn’t being used to it’s fullest of potentials 
 instead of running around my island over to the pantry (in a hurry) …
opening a drawer and scanning names seemed like a much more efficient way to store & locate what was needed (and save a dinner or two from the jaws of scorchment)

i like the idea of using wrapping paper to line drawers … the top side has a bit of a gloss finish to it, great for clean up … when it gets stained or torn, it’s easy enough to toss and cut a new piece … and a much cheaper alternative to the typical cabinet & drawer liners found in most houseware sections
(fyi: Hobby Lobby has a great wrapping paper selction, 
very thick paper and super durable)
measure, cut and fit


i sprayed my lids with 2 coats of chalkboard paint … i would highly recommend a primer first
as i later found that my chalkboard marker tip scratched some paint off a few of the lids
i prefer the markers to real chalk, it has a finer tip to fit more letters into small spaces 🙂
and it doesn’t brush off as easily
now all you need is a set of cute measuring spoons 
for all the measuring & using of spices you’ll be doing
cause your spice drawer is so dang cute
paprika anyone?
i hope to purge & simplify other problem areas in our house throughout the year
in hopes that our home will run more efficiently 
then our time together will be spent more …well … together!

i’m still working on my year long menu plan
that i can’t wait to share with you
(with printables!)
i’ve been working on a few other spots in the kitchen this past week too
i will be back to share those soon

oh! and my craft room feature in Better Homes & Gardens comes out in 10 days!!
the February issue will hit newstands on January 15th
i’m sooooooooooooooooooooooooo excited 🙂
look for me on the I Did It! page on the inside back cover!
a more detailed tour of the room will hopefully be published in one of the BHG special interest magazines sometime this year! can you believe it?? in 2 BHG magazines??
wow … i feel so blessed

loves to you & happy weekend ♥
linking up to …

Uncategorized

tea party mat for Two ♥ {with free pretty things for you!}


just poppin’ in real quick today! 
tons & tons to do with just a little time before Christmas day 🙂
wanted to share this little tea mat i made with another 

… from my bloggy bestie 
when i saw this graphic in her shop this idea popped in my head 🙂
(a small problem i have)

this little tea mat was for my girlfriend’s daughter a few weeks ago, for Christmas 
i think she loved it … i think i love it too! anyone wanna have a tea party??
(i may have secretly played with it before i packed it up in the basket)
there are no directions since it’s easy enough to do with basic sewing knowledge 
or even hot glue, felt and some pinking shears!


i used some leftover felt and pink gingham i had, and cut them to equal sizes 
quickly stitched the two long sides together and added ricrac to the two short ends to cover the raw edge
(forgot to get a close up of this, but you can see it in the picture at the bottom of the post)


use iron-on transfer sheets to transfer the image onto a small piece of white fabric
same directions as the vintage inspired message board here
then used a zigzag stitch to sew the image to the mat


the rolled felt flowers are the same as the ones i made for the 
add some embellishment and you are done!


now it’s time to play 🙂

oh, and if you want to make some felt tea bags, 
cut two small squares of white felt with pinking shears
then cut a piece of brown felt small enough to fit in between the two white ones
sew them together and insert a piece of cording into the top before stitching it completely closed … cut two hearts from some more felt and glue them together at the other end of the cord. 


this was a fun Christmas gift! what about for a little girl’s birthday?
the tea set and cupcakes were store bought and the picnic basket was from a garage sale
fun!
Merry Christmas everyone!
♥ 
sweet parties here:
Free Pretty Things for You! ♥ Whatever You Want Wednesday
live laugh Rowe ♥ live laugh linky
the 36th Avenue ♥ Party Time!

Uncategorized

joy to the world ~ wood slice project ♥

Christmas is next week!
these past few weeks flew by …
i just wanted to say thank you thank you thank you … for the love & support given to my blog and my shop ♥ it puts so much gladness in my heart to hear that God is encouraging you through this little place here in bloggy land, and i really appreciate all of you so much!

i spent some time last week putting up a few new Christmas decorations
and this wood slice art is one of  the things i wanted to try … so here it is!


the wood slice is from AC Moore
the wooden letters are from Michael’s
i found a huge box of maps at a rummage sale,  and i bought the whole thing for $7!
( i ♥ rummage sales with big boxes of maps)
i mod podged the map onto the wood, 
when it was dry, went over the top with two more coats for a shiny finish


once you cut the twine to fit, string the letters and wrap the ends around to the back of the wood … just a little dab of hot glue and some felt will hold it like Fort Knox


super easy project with just a few supplies … i love the simplicity of it
hope to be back this week with a few pictures of my craft room … Christmas style 🙂
much love & happy crafting ♥

sweet parties here ♥

Free Pretty Things for You ♥ Whatever you want Wednesday! 
Live Laugh Rowe ♥ Live Laugh Linky 
Yesterday on Tuesday ♥ a Crafty Soiree
the 36th Avenue ♥ Party Time!
Tip Junkie ♥ Tip me Tuesday
Tatertots & Jello ♥ Weekend Wrap up Party
Funky Junk Interiors ♥ Saturday Nite Special
i {heart} naptime ♥ Sundae Scoop
Uncategorized

simple packaging idea … Everything Etsy ♥

hi all!
i’ve been sparse around these parts the past few days
Black Friday weekend sent my shop into hyper drive
and i’m taking a quick break from my sewing machine …
just to tell you i’m posting over at Kim’s place today

if you need an easy – stash busting – way to spruce up your pretty presents this year
hop on over there and say hi 🙂 the instructions to make these cuties are sweet & simple

they’re also for sale in my shop too!

all wrapped up and ready to love ♥
be back later this week with a quick advent calendar project that we can make together…
loves!


Uncategorized

pretty diy ♥ up~cycled dishrack


i’m super duper excited about the Better Homes & Gardens shoot this week 🙂
and i’ve been super duper busy shopping for some new clothes, making paper flowers, spray painting stuff and putting a few finishing touches on my craft room …
{and cleaning my house}

so i thought i’d sneak in a quick project that i did last week
using some more of Keren’s beautiful digital art!

if you’re stopping over from FPTFY … welcome!


i was inspired by a few pictures i saw on Pinterest of old dishracks turned into neat little organizers for holding file folders, pens & pencils … i spray painted a thrifted dish rack white and covered the utensil holder with some strips i cut from a vintage sheet
i made my file folders out of chipboard {but any manila folders will do} and used the bicycle image from Keren’s shop to embellish the folder that would be in front 🙂 fun!


washi tape and a sharpie … all you need to label the folders
if you’re like me {and change your mind a lot} they’re easy to remove & replace when you need to reassign the folder


it’s a great project when you can take something you aren’t using anymore and turn it into something that has a new & fresh purpose … and that’s cute to boot 🙂


much love to you all this week ♥ 
hopefully i’ll be back Monday with a bunch of fun stuff to share!
happy crafting …
linking up here:  ♥
the 36th Avenue ♥ Party Time!
Funky Junk Interiors ♥ Saturday Nite Special
i {heart} naptime ♥ Sundae Scoop Link Party
live laugh rowe ♥ live laugh {linky}
Tatertots & Jello ♥ Weekend Wrap up Party