
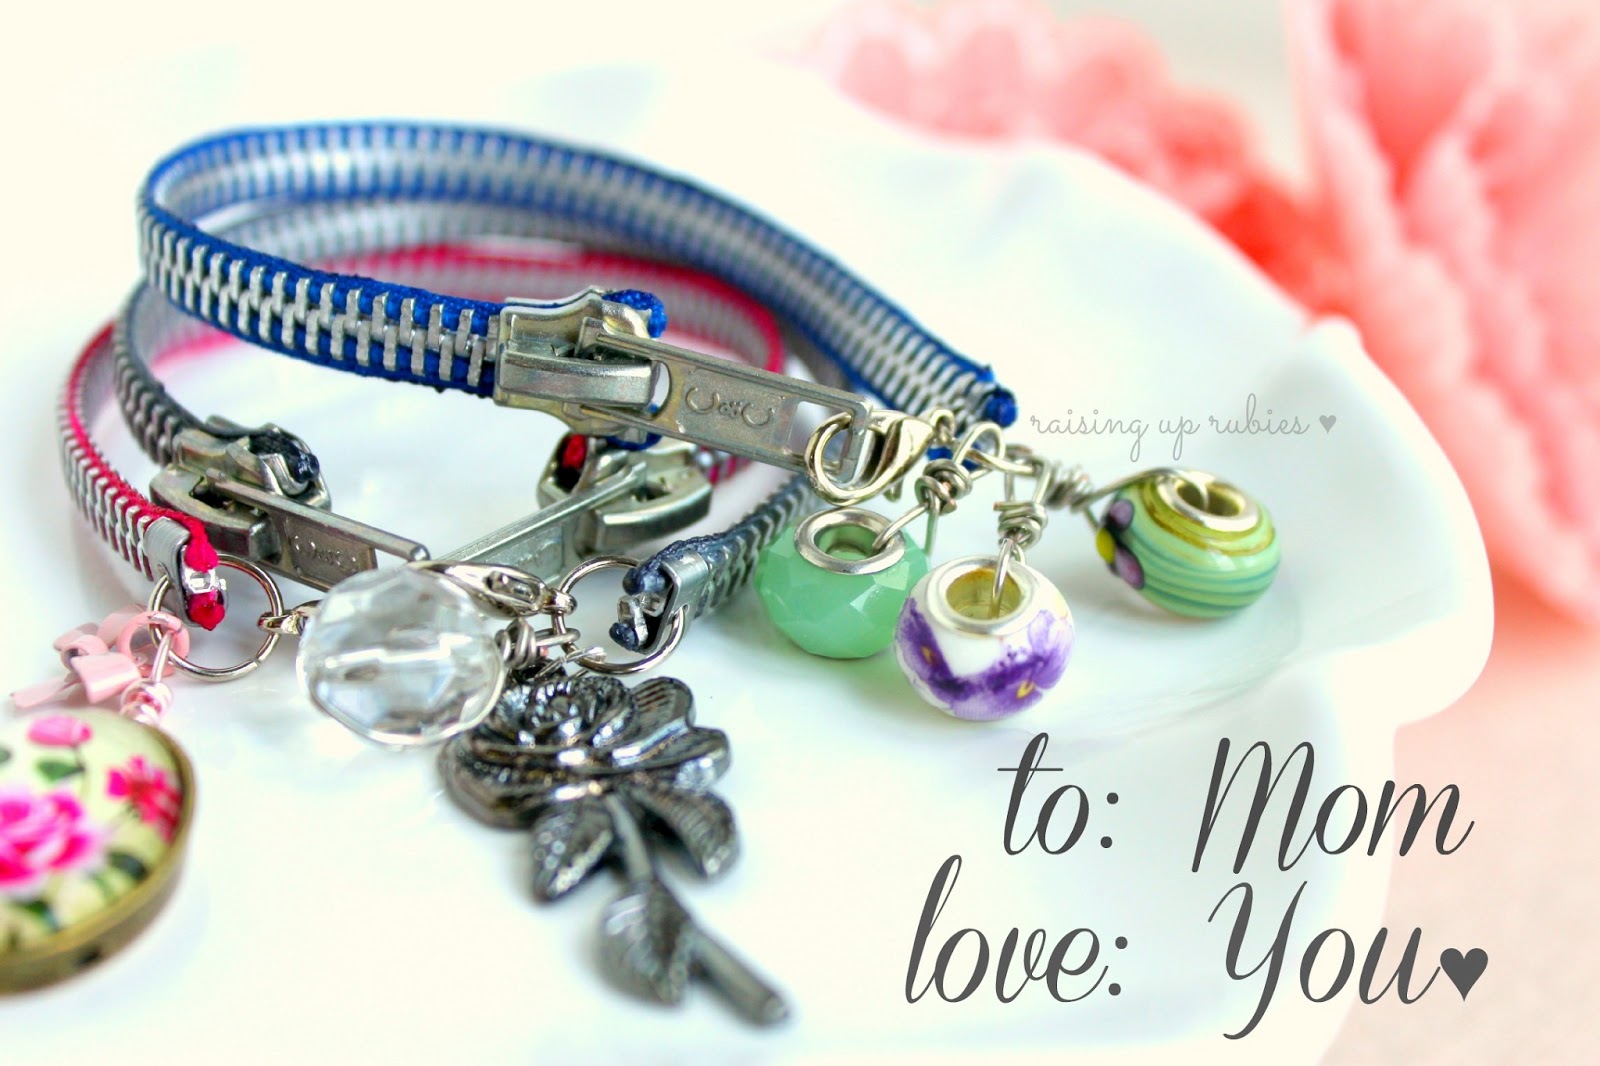
Mother’s Day always sneaks up on me 🙂
it’s almost here, and i have a great handmade gift idea to share with you!

all week long, myself & the nine other bloggers, are sharing handmade gift ideas
that will make your mom, or any mom, feel super special ♥
yesterday Megan from the Remodeled Life shared the how-to
for a pretty silhouette necklace …
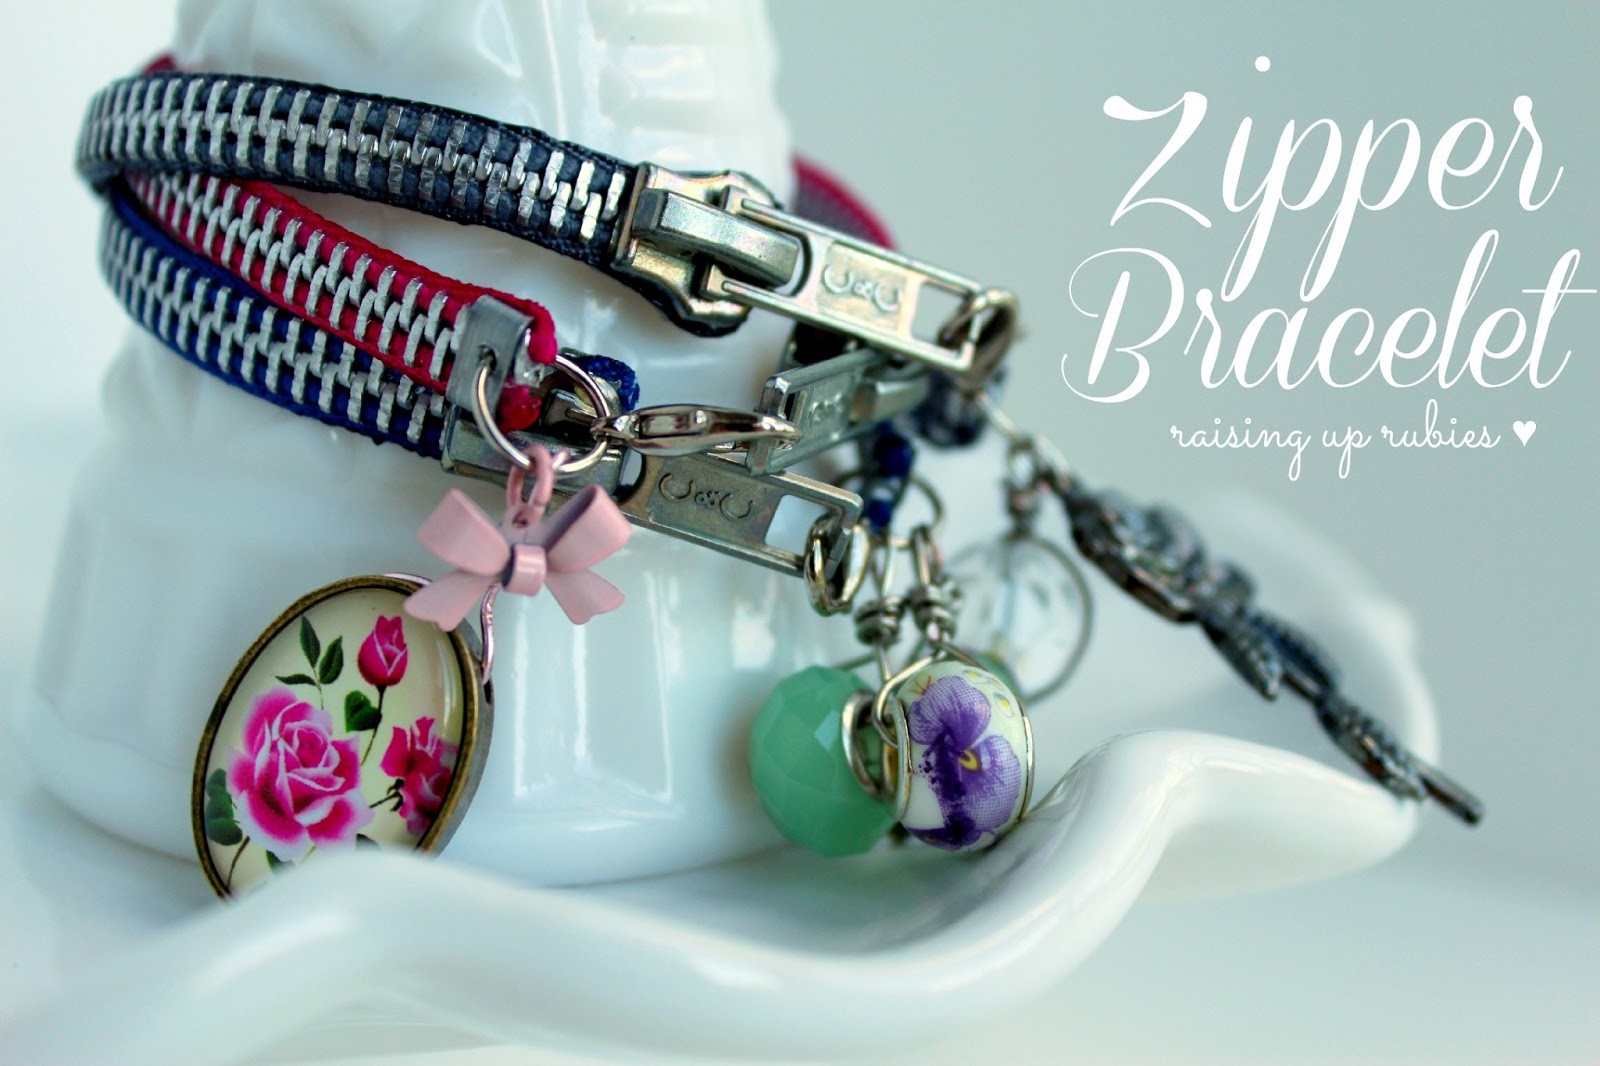
and i want to show you how to make one of these funky fun zipper bracelets
kay? let’s make stuff!
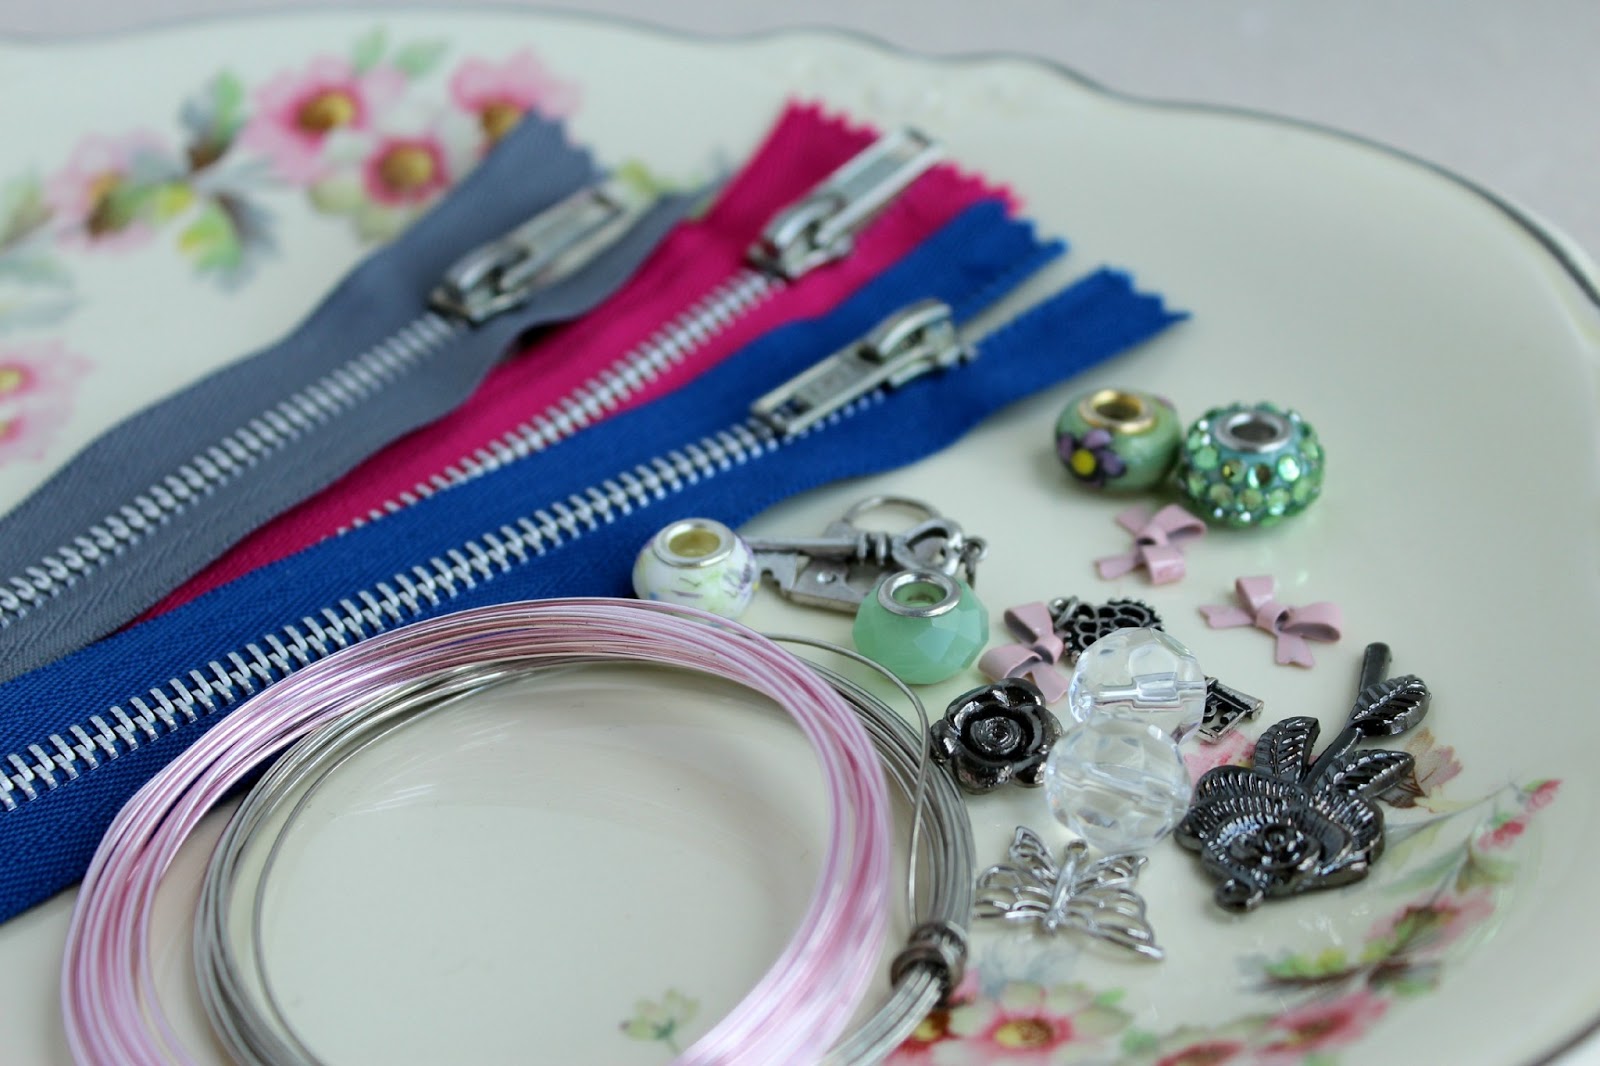
you’ll need:
7 inch separating zippers ~ charms – beads
20 gauge jewelry wire ~ lobster clasps
and some jewelry pliers

this is really the only tricky part …
using a drill with a small bit attached,
drill a hole through the clamp at the base of the zipper
(slowly & carefully 🙂

using the pliers, i separated the jump ring,
added the lobster clasp and attached it to the the base of the zipper
(where we drilled the hole 🙂
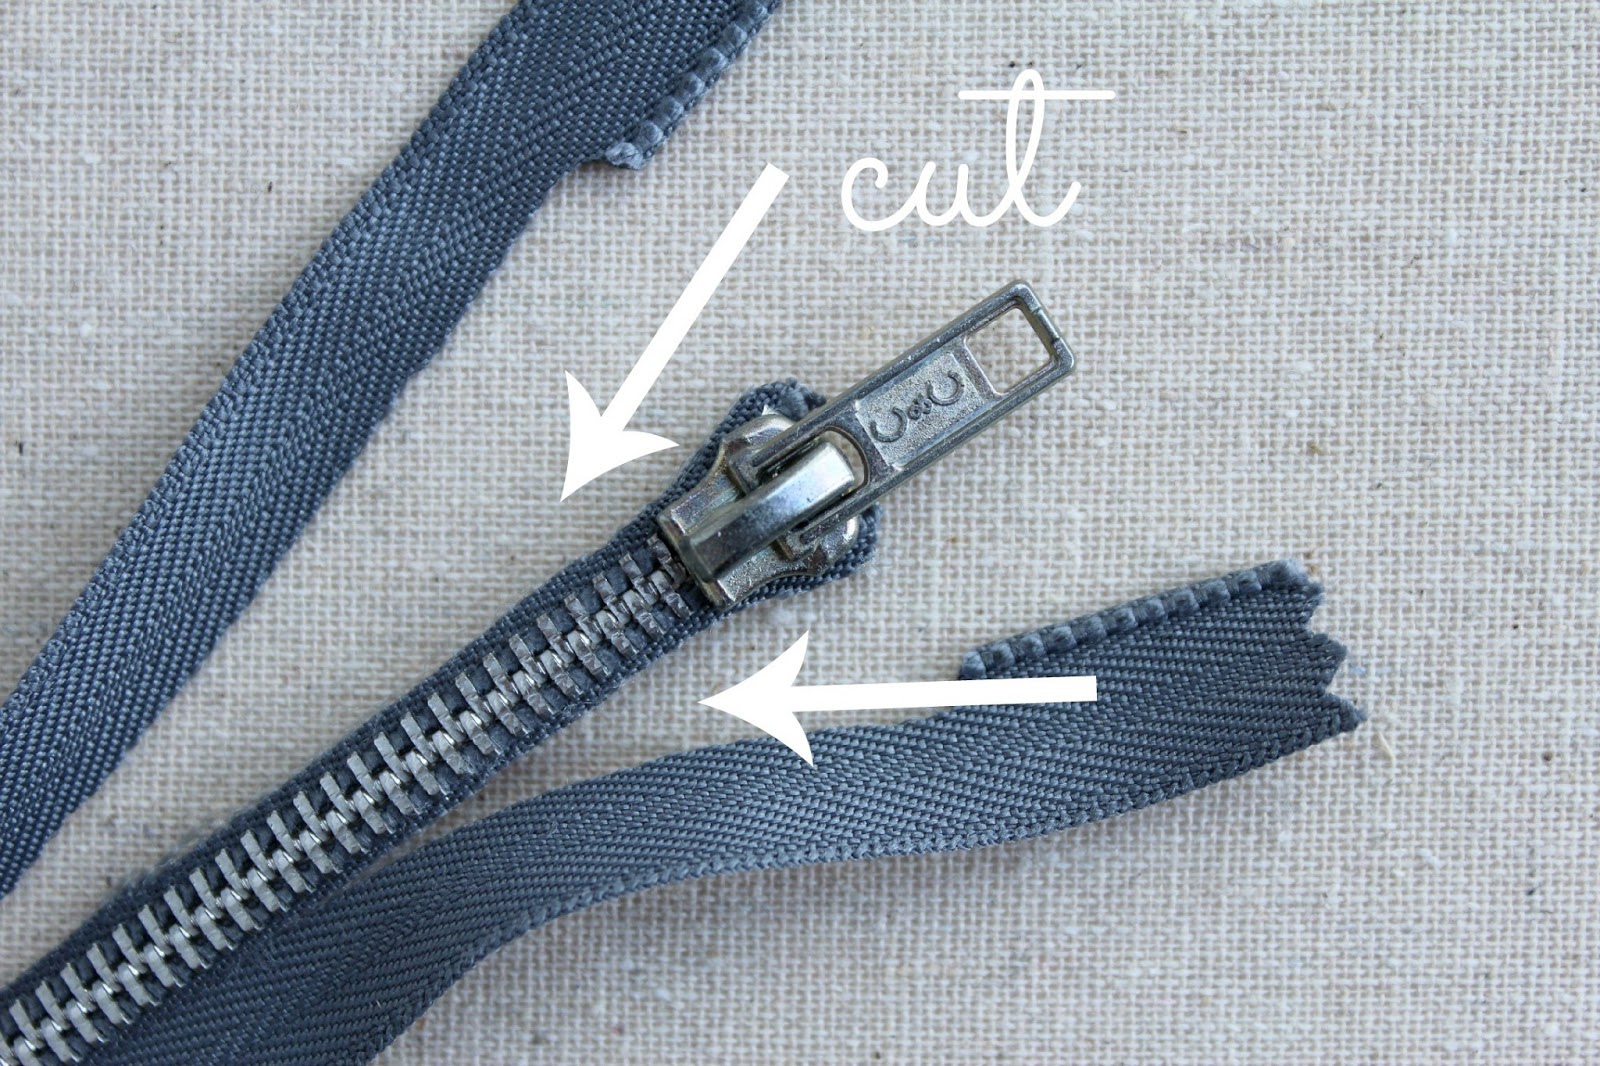
with scissors, trim down both sides of the zipper close to the teeth,
while leaving a bit of the colored edge
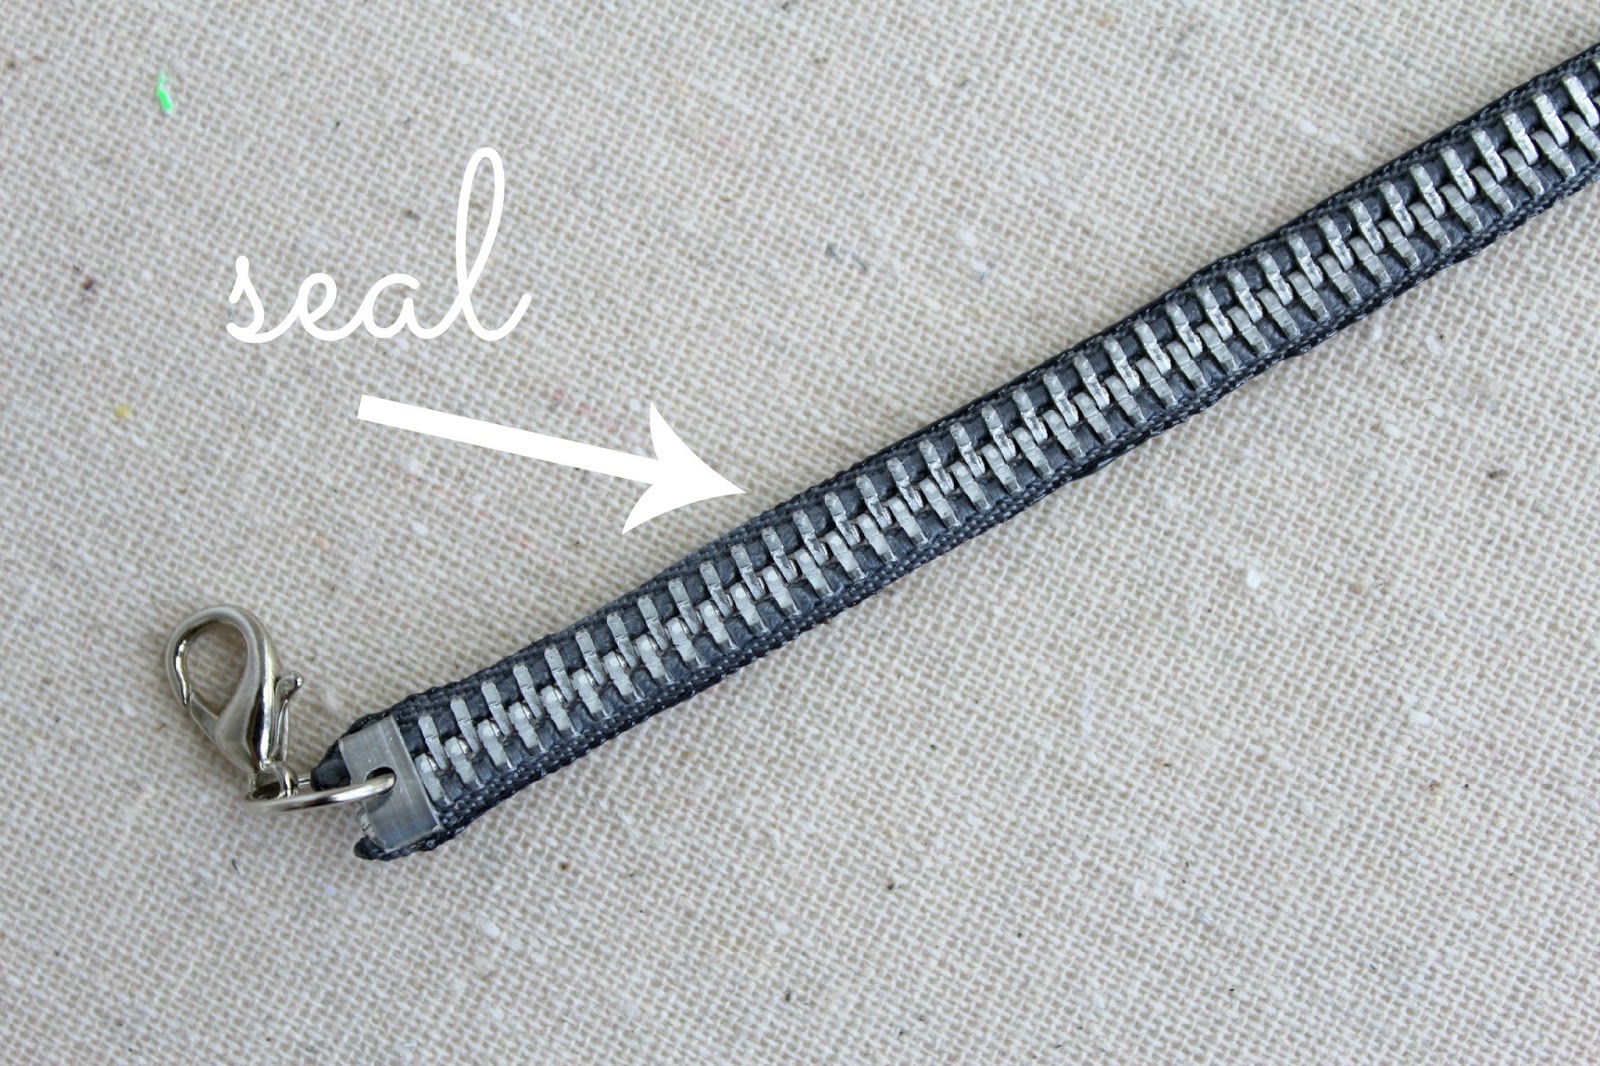
to keep the edges from fraying i used the flame from a small candle
to heat & seal the edges of the zipper
(it will also burn off any stray pieces that are left after cutting)

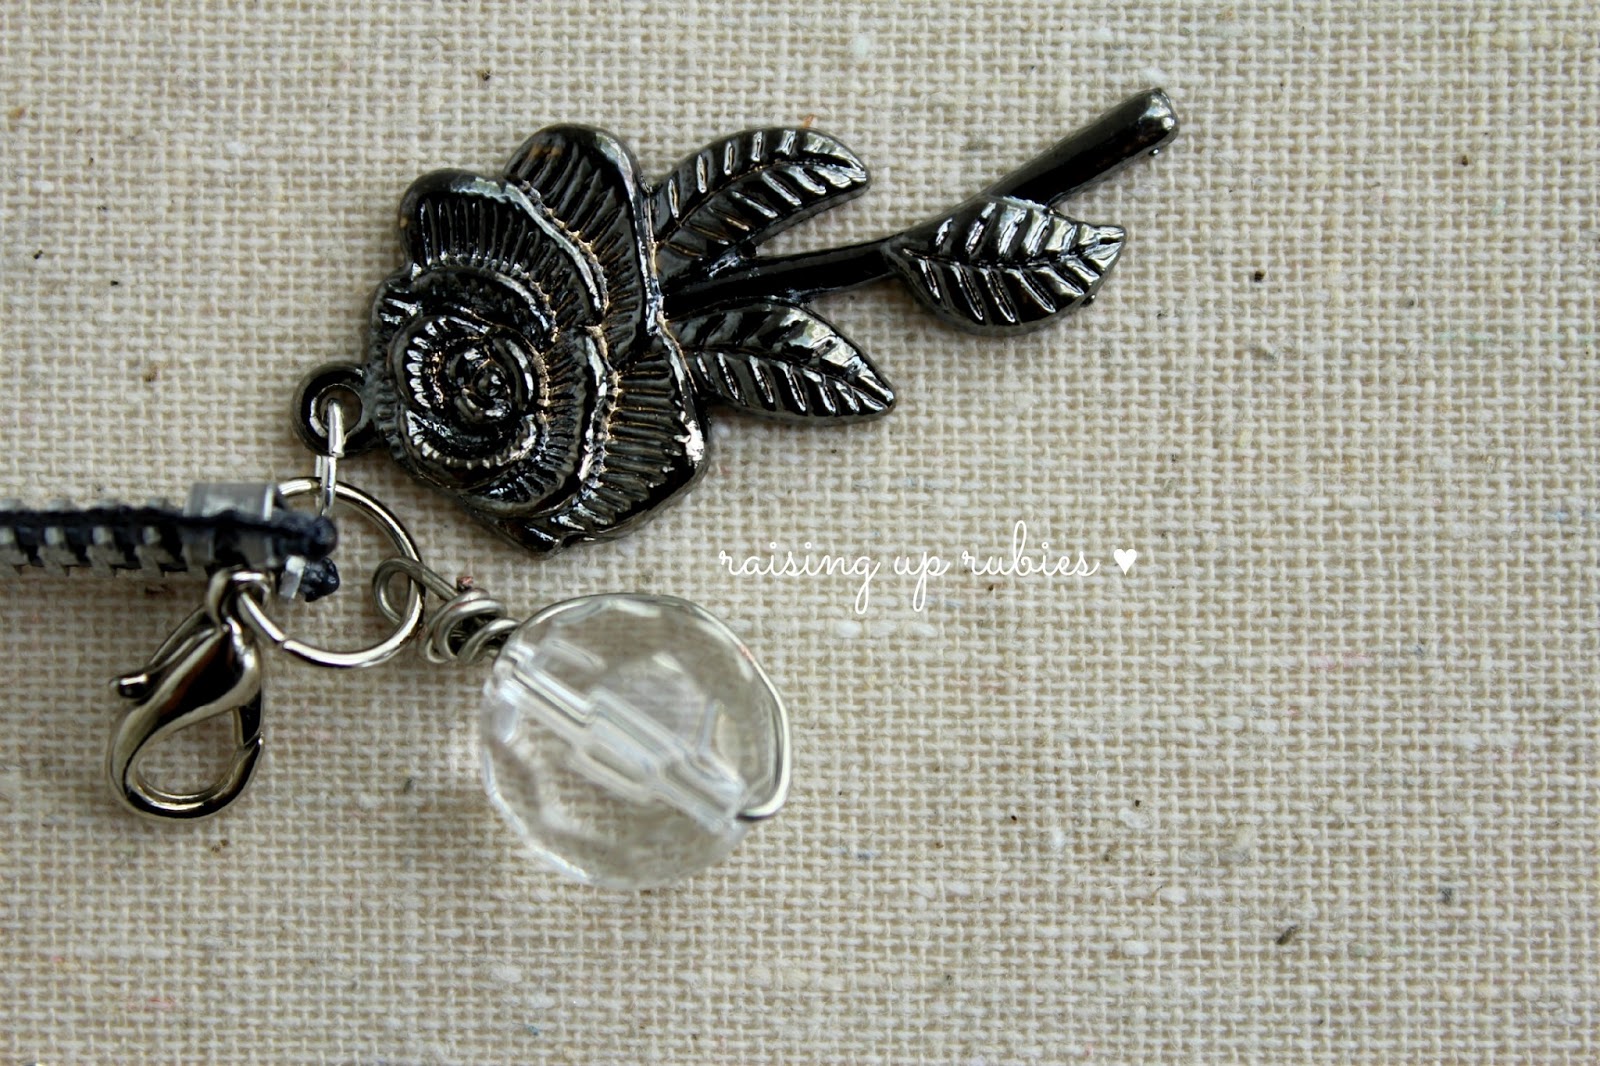
now time to embellish!
i added a few charms and beads to the same ring that holds the clasp
i really don’t make jewlery all that often, so i just went with it!
and tried different things until i found a combination i liked…
it’s fun to experiment
🙂
once all the pieces are attached … wrap it up in a pretty box and it’s all set for mom!

(then maybe make one for yourself too 🙂

will be sharing another project tomorrow
be sure to hop on over and pay her a visit!
happy crafting!

linking up here:

love these! I am totally going to try this for my friends!!!
LikeLike
These are so cute Jaime!! What a great idea! 🙂 Happy May, have a great day!! xo Holly
LikeLike
Love them!! Oh so funky and fun. Thanks so much for being a part of the series, Jaime! xo
LikeLike
Love these bracelets, Jaime! Just pinned to my Jewelry DIY board on Pinterest. Now I just need to get my confidence up to consider trying to make these myself! 🙂
LikeLike
Thank you for a wonderful tutorial. Now to be brave enough to use a drill:)
LikeLike
have fun! once you make one, you have to make more! 🙂
LikeLike
thanks for having me Kelly! ♥♥♥
LikeLike
oh you can do it! jewelry is not one of my go to crafts either … but you can't mess these up 🙂 and you can be as creative as you want! thanks for the visit ♥
LikeLike
ha! have to confess the hubs drilled the holes for me 🙂 but watching him do it, looked easy peasy! you go girl! ♥
LikeLike
So stinkin' Cute, Jamie! Is it ok to make yourself a Mother's Day present? Lol. I want one 🙂 Thank you for the sweet tutorial. Happy Mother's Day!!Hugs,Laura
LikeLike
I love this! What a fun idea!! Pinning!!
LikeLike
Soooo cute, Jamie! Loving this series! Also pinning! xo, Claire @ ALittleClaireification
LikeLike
these are sooo cute! what a fun idea! 🙂
LikeLike
These are GORGEOUS!! I know I'd love to be sportin' one of these babies!!
LikeLike
These are absolutely adorable! I am going to have to make some…the possibilities are endless! Thanks for sharing…:)Blessings, VickyLife On Willie Mae Lane
LikeLike
Cute…forwarded the idea to my daughter. Would like the charms to be spaced out so they dont always fall to the bottom of your wrist- thx for sharing the tut. 🙂
LikeLike
SHUT UP!!! AHHHH !! LOVE!!! WE NEED TO TALK lol
LikeLike
Love this! And you make it look so easy, too! I have to try this one!
LikeLike
Soooo unique and pretty 🙂 Love!
LikeLike
These are awesome and my daughter and I will be trying these very soon. Love your blog. I have been following you since I saw you featured in BH&G magazine.
LikeLike
Wow Jamie, these bracelets are so pretty! How fun for mother's day! I love how you can personalize them with charms! Too cute. By the way, I'm loving your blog so much!
LikeLike
Oh, I absolutely adore this! Thanks for sharing such a great idea!!!Brooke – DesignedByBH
LikeLike
So cool!
LikeLike
thanks so much Donna! glad you're here ♥
LikeLike
super easy! have fun Jamie! ♥
LikeLike
great idea! you're welcome!
LikeLike
thanks so much! ♥
LikeLike
How CUTE is that???! Love this – thank you for the tutorial 🙂
LikeLike
How CUTE is that???! Love this – thank you for the tutorial 🙂
LikeLike
Hey Jaime, where do you recommend getting these zippers from? I have found many but they look cheap.
LikeLike
I buy mine at joanns! 🙂
LikeLike
Similar to LiveStrong wristbands, Custom Debossed Wristbands can be personalized to engrave a message of your choice in sunken-in format. Debossed bracelets can be worn by people of all ages as a fashionable accessory to flaunt their style.
LikeLike
These are adorable! Thanks for the tutorial!
LikeLike
I love the idea, too. Thanks for the tutorial. I think, though, you may want to change the description of the zipper. A “separating zipper” is one like in jackets where at the bottom both sides come completely apart, and you have to insert one side into the other. You've featured a regular zipper with the cross bar at the bottom, which is necessary for drilling and attaching the closure and charms. Hope that info. is helpful to you.
LikeLike
This comment has been removed by the author.
LikeLike
That is an amazing idea! Wonderful
LikeLike