Uncategorized

summer in a jar … ♥


it’s officially summer here 🙂
school is over and we’re excited for some fun stuff ahead

last week i wanted to come up with a few small teacher gifts for the girls to bring on the last day of school … 
and i’ve been on a “gift in a jar” kick this year
so i figured i’d end the year with one more last hoo-rah 🙂

these were for teachers & school staff
but they can be for anyone!
a summer birthday party gift or a friend pick-me-up present


i tried to find things that were all the same color
the neon orange & pink together really made it look like a little bit of summer bottled up in there 🙂


i found everything at Target … mostly in the travel section 
except for the gum and the drink mixes
everything fit in there quite nicely…


with just enough room on top for the poofy bath thingy … whatever those are called


whipped up a little label and punched it out with a big round scalloped punch


i put the hand sanitizers on the outside just because that pink was so pretty i didn’t want to hide it! 
and there ya go! sum. sum. summertime in a jar! 
heehee 🙂


linking up here:
Uncategorized

growing blueberries … ♥

this is the first summer we’ve had blueberry bushes
my husband planted two of them last fall
and now we have a small harvest 🙂


they are so sweet and delicious
how nice to have fresh fruit right in our backyard 🙂

we want to plant raspberry bushes next 🙂
the hubs also built a tree swing for the girls
looking up is where he attached the rope & clasp to the tree

this is what i found at the other end of it 🙂

any family favorite recipes that include blueberries?
i’ve seen a few yummy ones on Pinterest … 
was thinking of trying these blueberry cream cheese muffins from i am baker


IMG_5198.stamp


maybe a batch for now & a batch to keep in the freezer for on-the-go mornings 🙂
yum .
i’ll let ya know how they turn out …
oh and i keep forgetting to tell you guys
i’m on instagram!  it’s fun!
  i’ve been on for a while but just started getting into it these past few weeks
i even put a little thingy up in the sidebar
see it … up there … see it???
go find me! 
raisinguprubies
so i can follow you too 🙂


♥ much love

(vintage graphics courtesy of the Graphics Fairy … just gotta love her)


Uncategorized

a yardstick flag tutorial… ♥

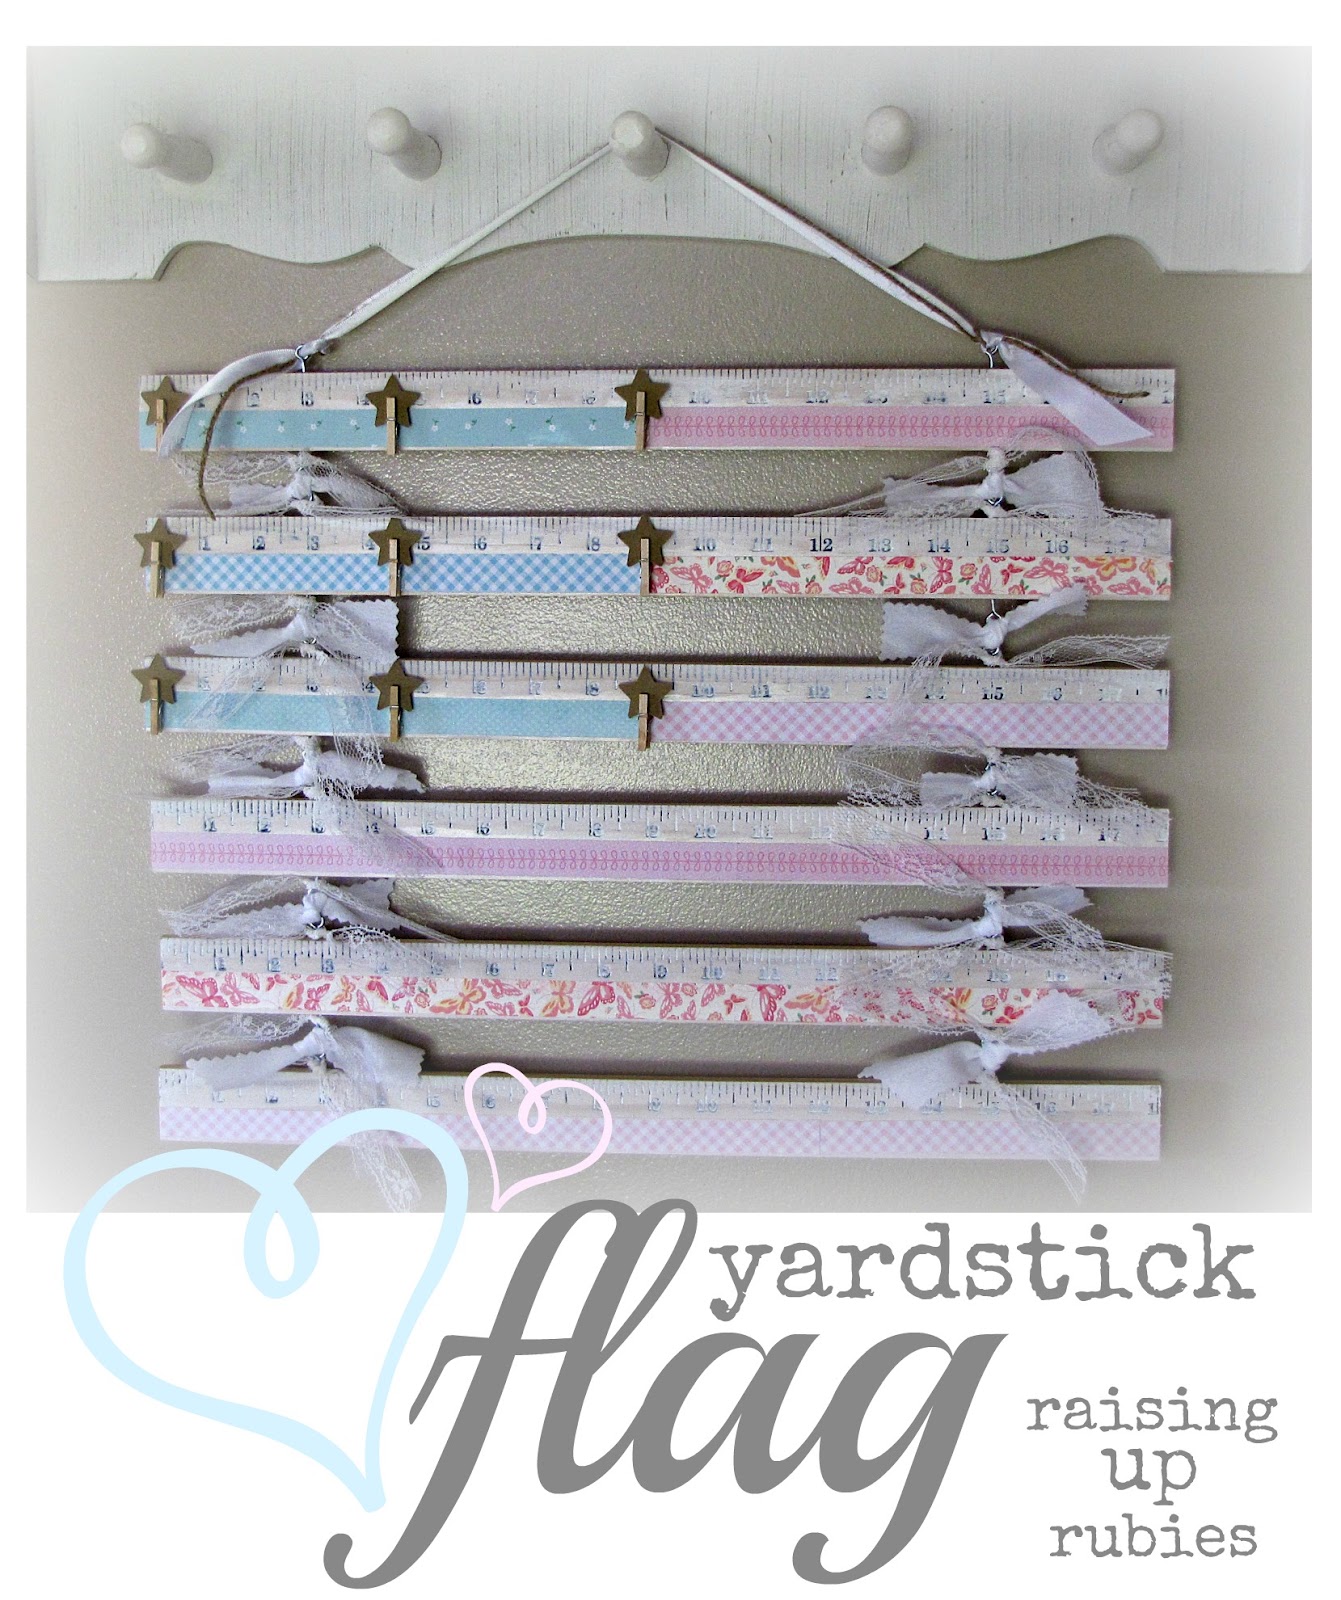
i’m really excited to share this project with you!
it’s really neat, and something new…


this came to me late at night a couple weeks ago
(probably when i ate too many whales)
(i’m addicted to these things guys)
(thanks to my cousin 🙂


this is super easy to make
the only thing my hubby did for me, was cut the yardsticks in half
and he drilled the holes too
(even though he has taught me to do both of those things myself)
(i just don’t jump at the chance to use “big man” tools)
(i’ll stick with a glue gun & corner rounder 🙂
(thanks)
but girls! i know the guys at Home Depot will cut stuff for you…just ask!
the rest is cake …

i just have a special place in my ♥ for yardsticks
i built these crates last year 


and ever since then, i’m sweet on yardsticks …
so i know my yardsticks guys…
i know Home Depots are orange (blah)
Lowe’s are navy blue (yay!) 
(these are the ones i like to buy at 69 cents each)
and Walmart’s are a really pretty light blue (cuteness)
but beware, they are much thinner and not always straight …
(right? a crooked yardstick is not really a good thing)

for this project i stuck with my fav’s ~ Lowe’s since they are the thickest
and since the numbers & lines printed on the sticks are a little indented
helping them have that “whitewashed” look 

nuf talkin’  …  come on! let’s make stuff ♥

what you need
♥ 3 yardsticks
♥ small screw eyes (see picture below)
♥ white acrylic paint
♥ Mod Podge
♥ pretty scrapbook paper
♥ fabric strips, lace, twine, ribbon 
♥ mini clothespins
(or whatever your heart fancies 🙂 


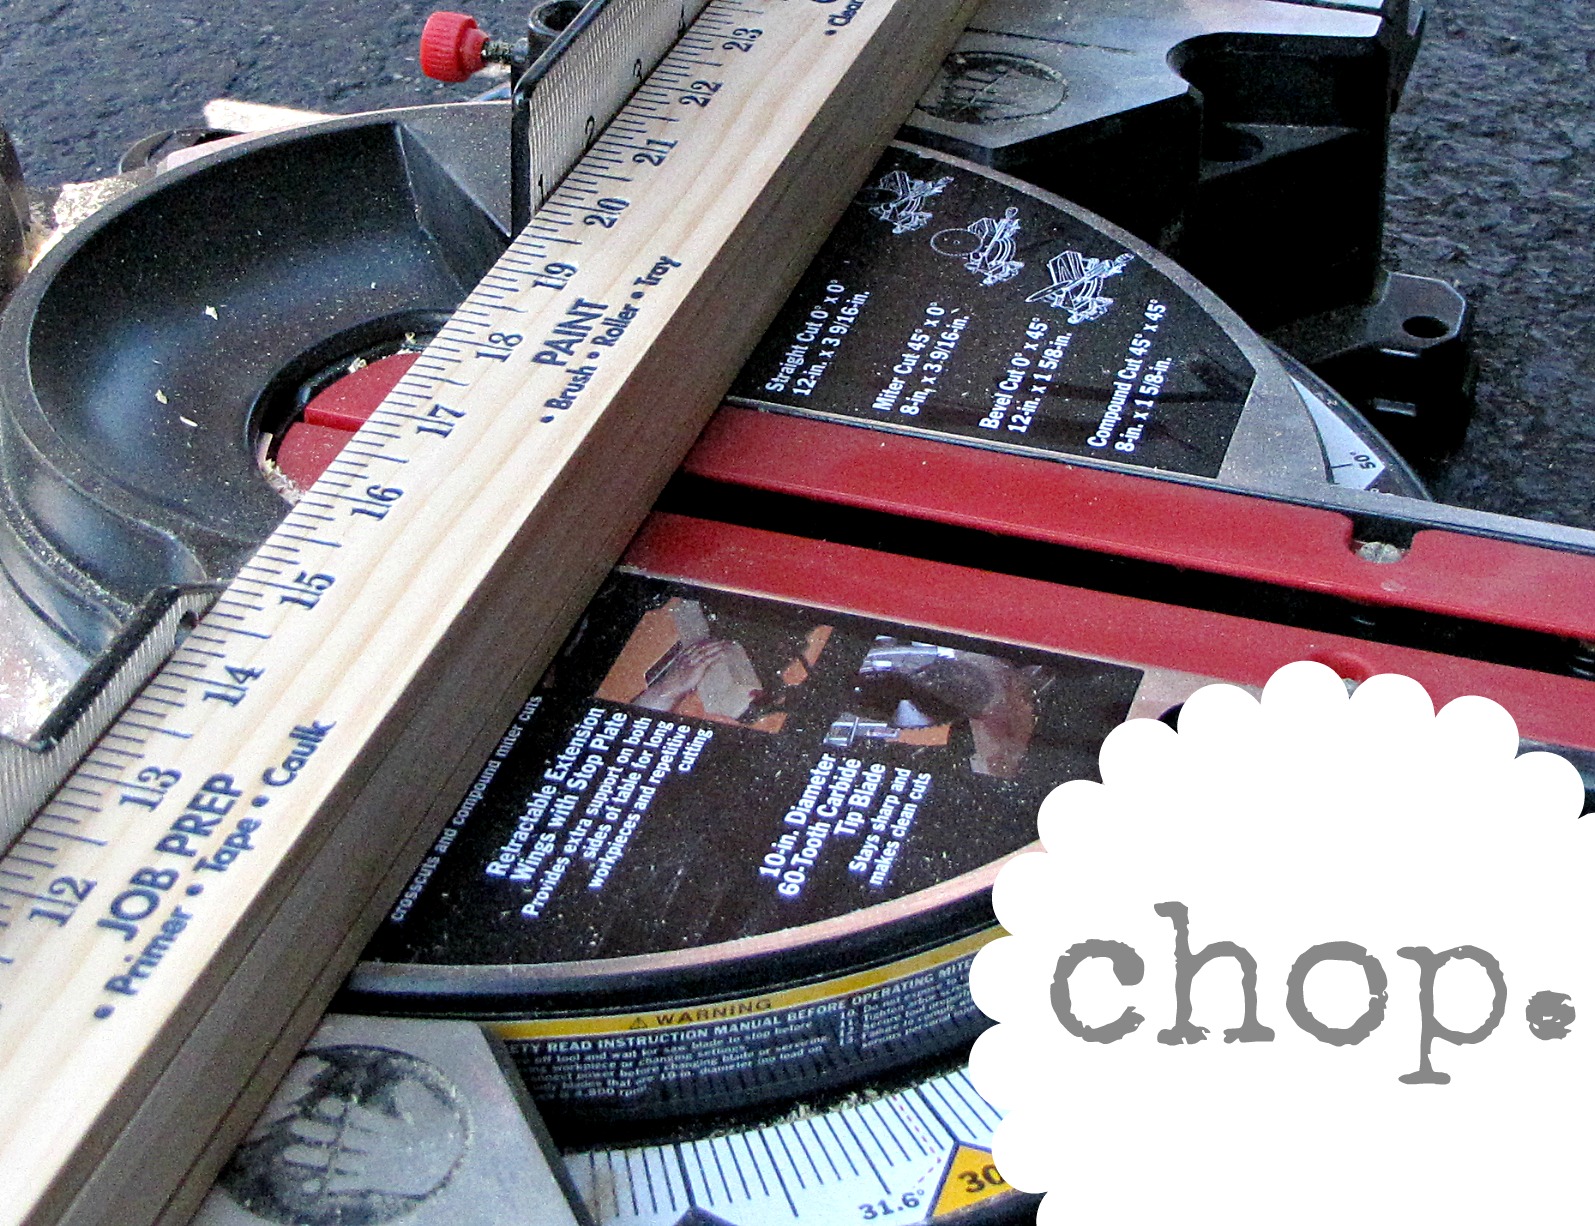
we used the chop saw to cut the yardsticks in half ~ right at 18 inches


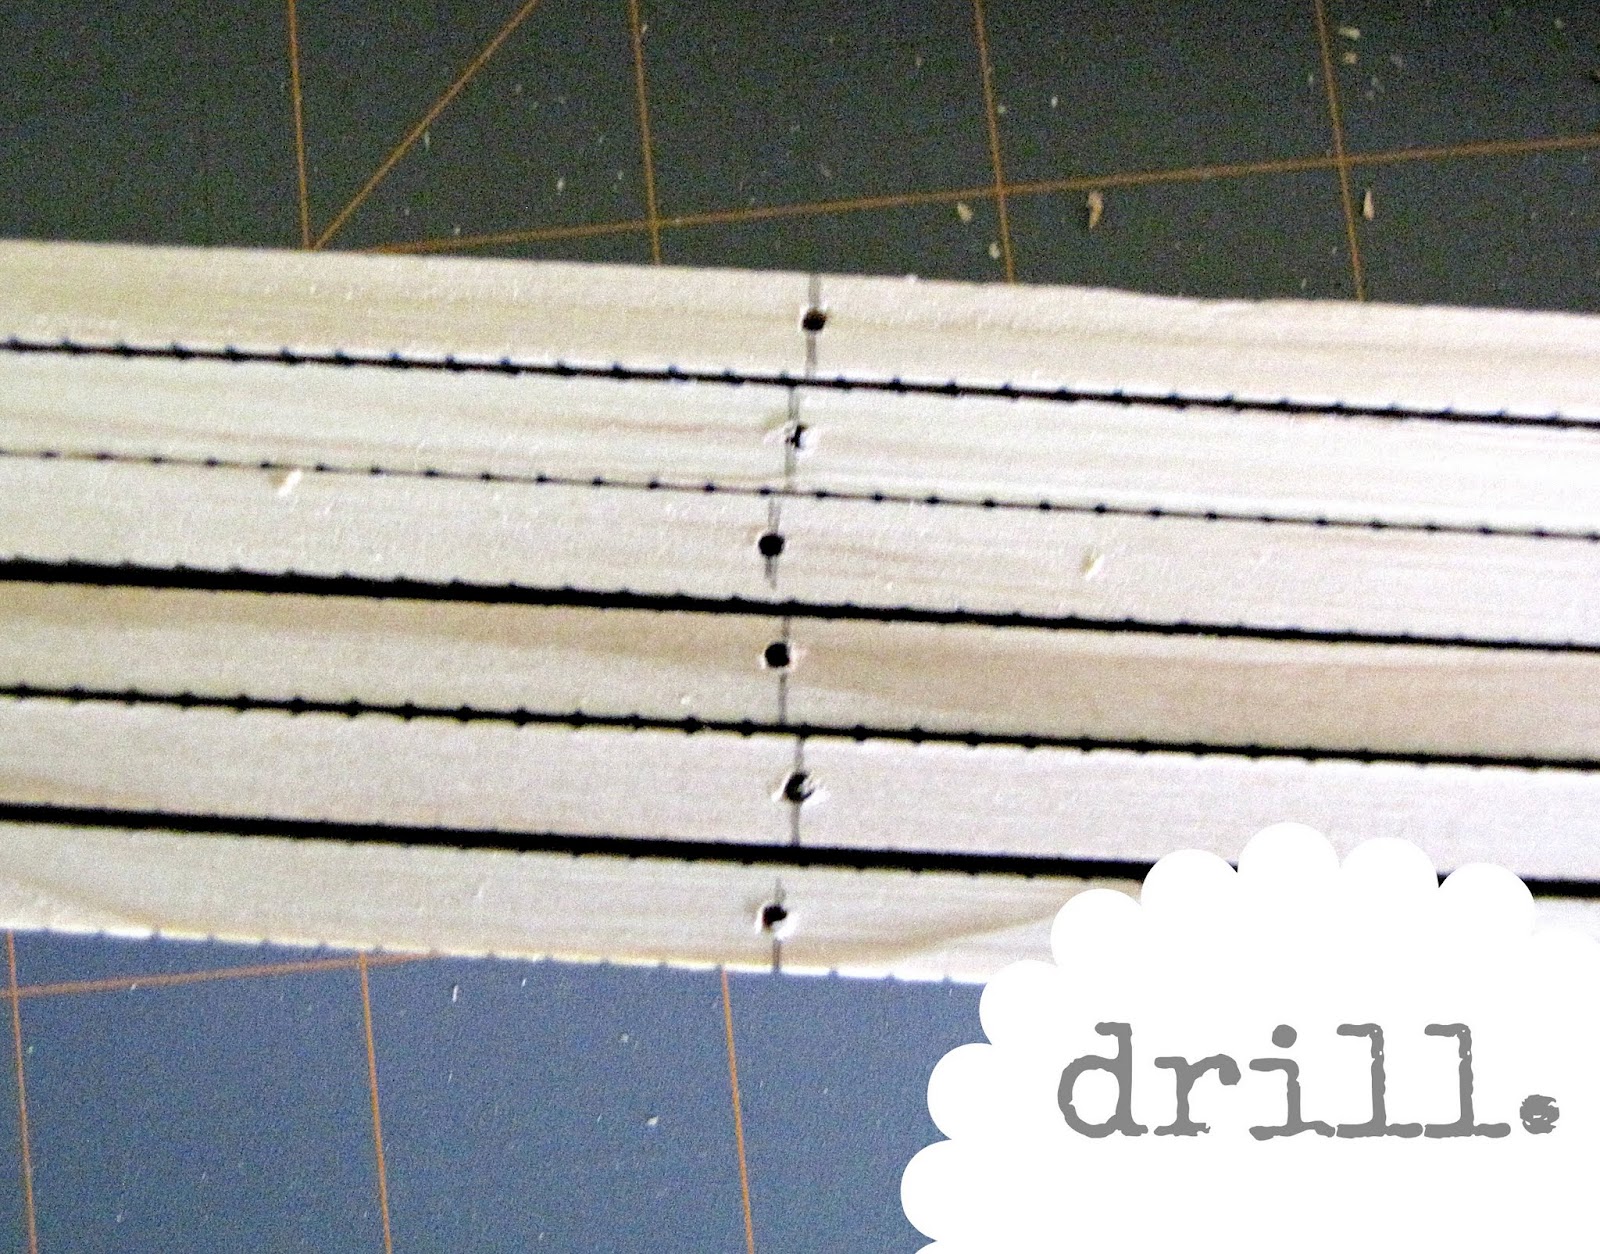
mark the point where you will screw all the eyes in …
they should be all in the same place on every yardstick
ours were about a 1/3 of the way in from each side


drill the holes carefully! hubs used his very teeny smallest drill bit
don’t forget on each end … top & bottom


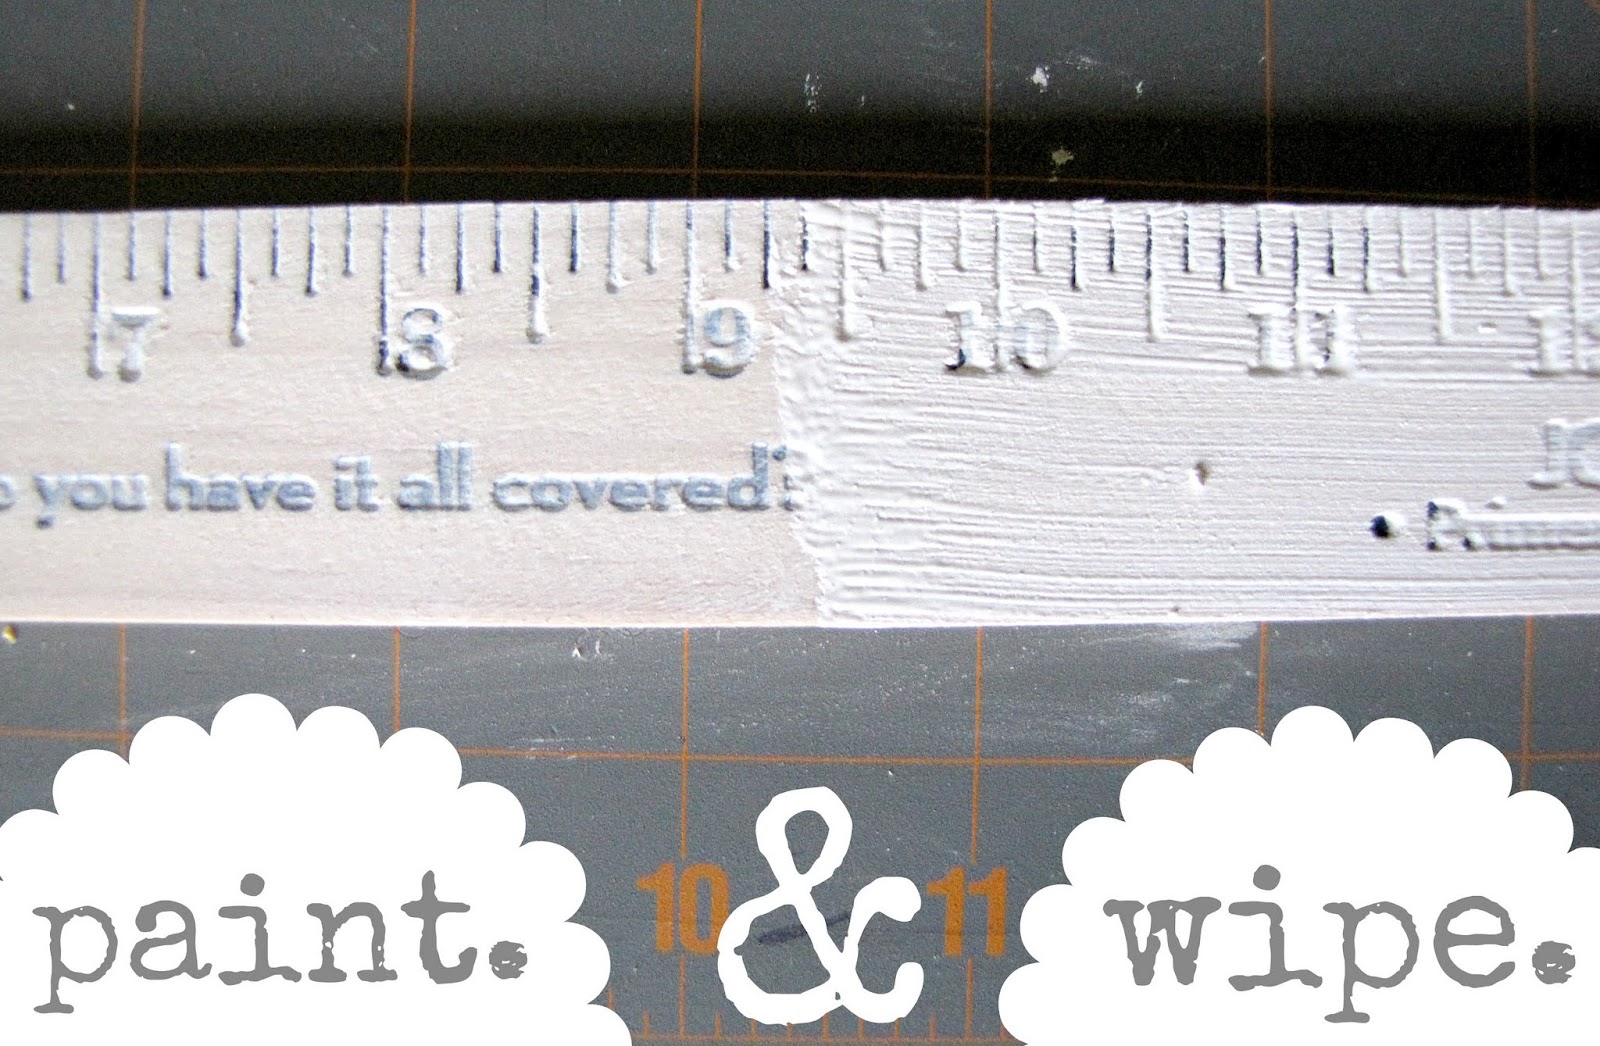
using white acrylic paint, i brushed it on moderately
then with a rag i wiped it off
(the left side is after i wiped off the excess)


last thing before the pretty part
is to screw those eyes into the holes you drilled 


now the pretty part ♥
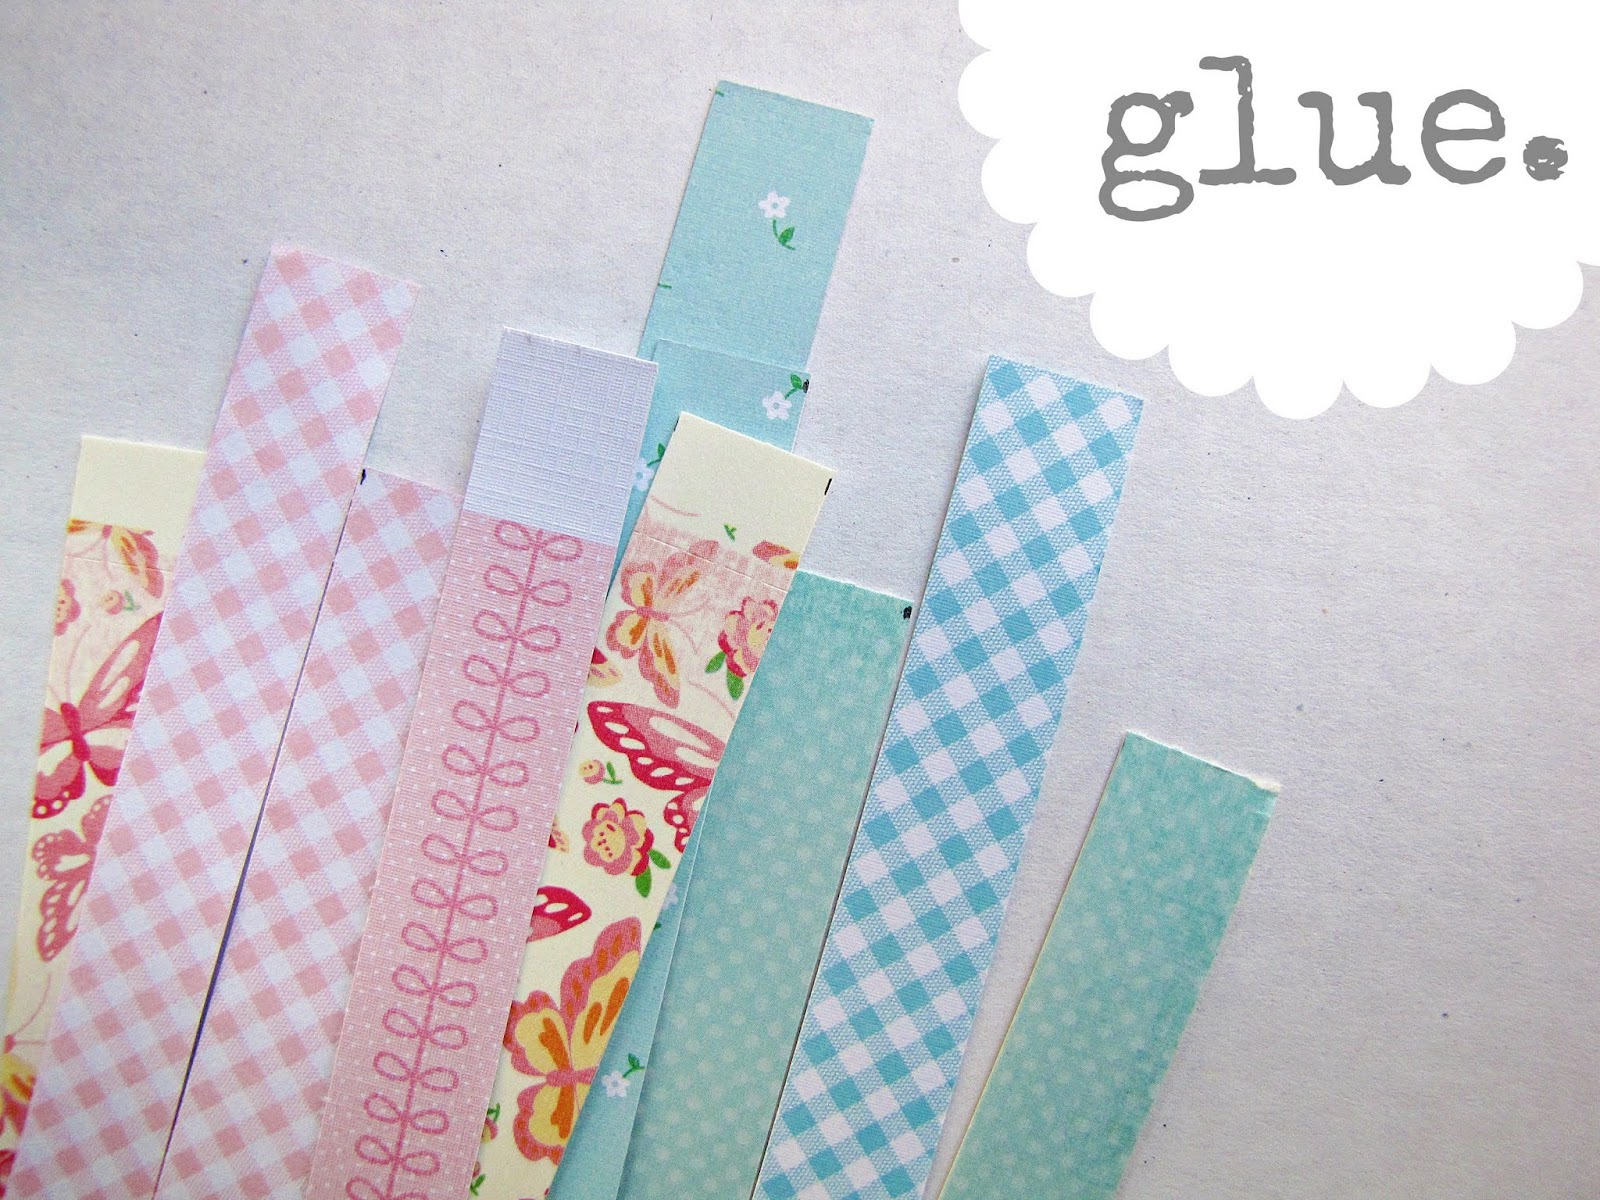
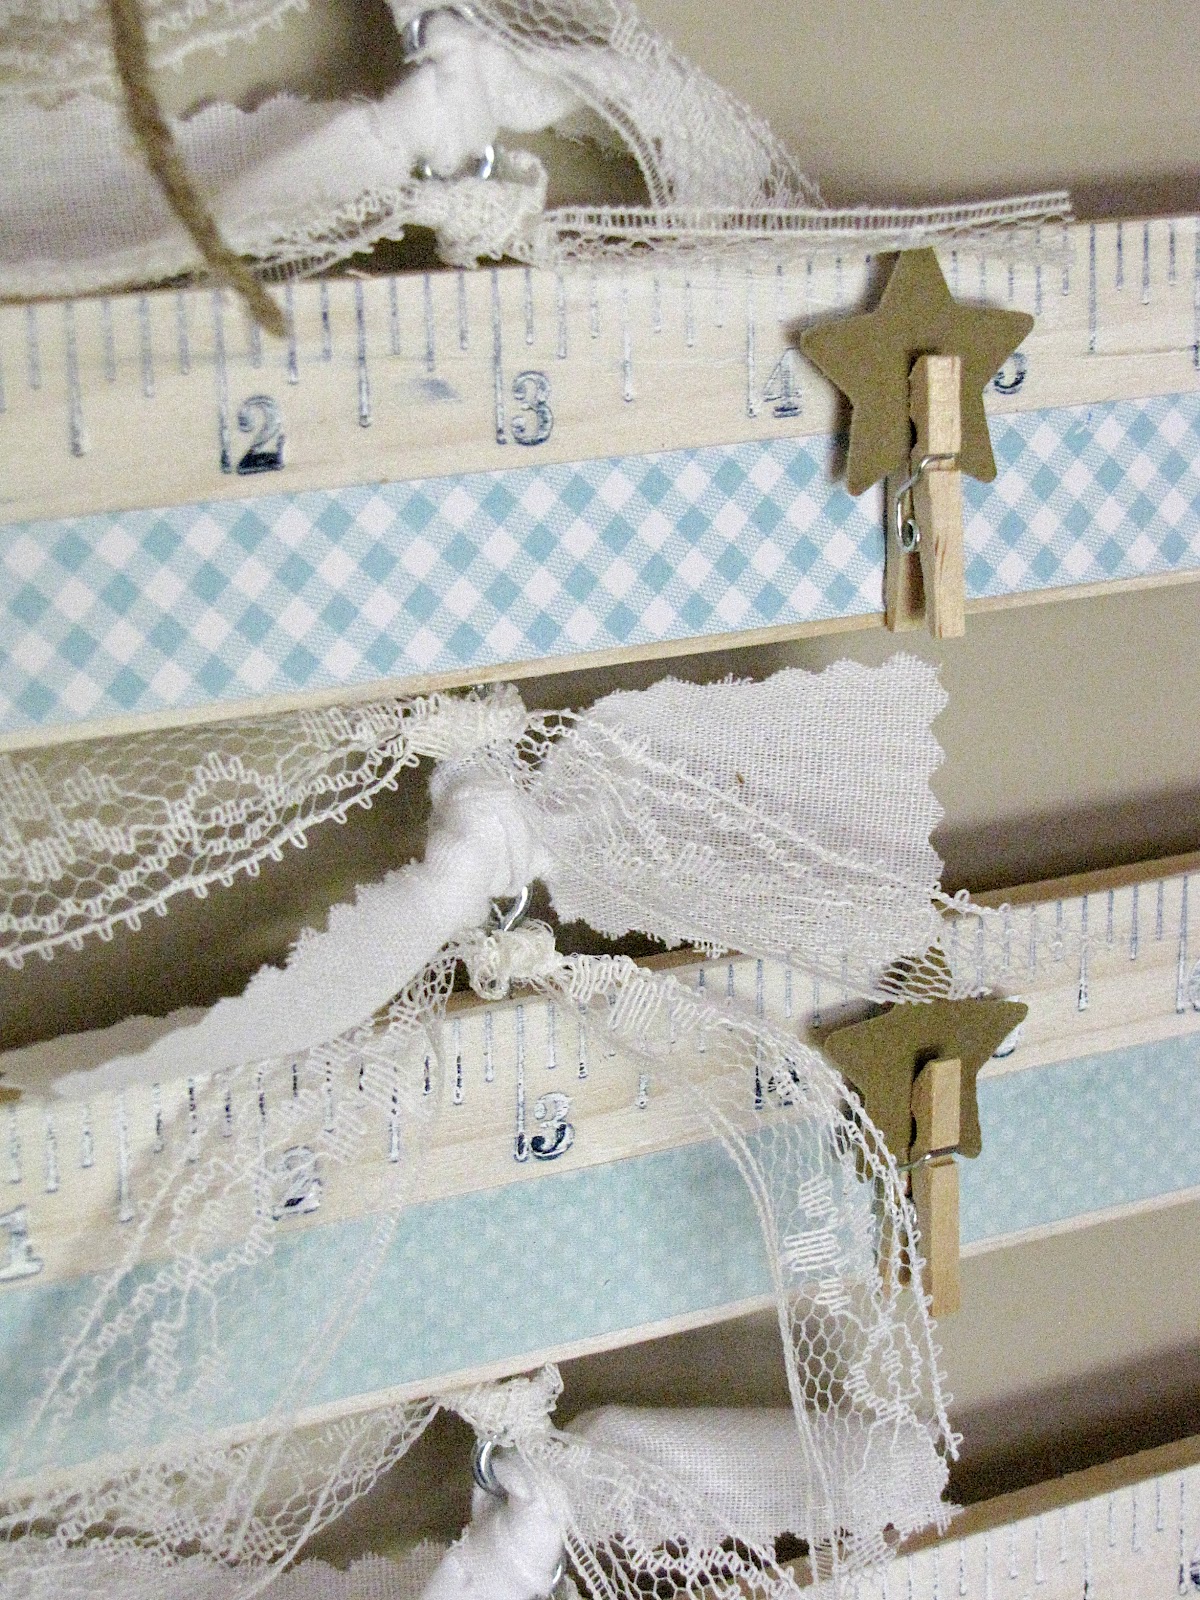
cut strips from your scrapbook paper just wide enough to cover the bottom half of the yardstick … 
we don’t wanna hide those cute numbers & lines
use the Mod Podge to adhere them in the sections where the “stars & stripes” would be

i used strips of white muslin, lace and more lace ♥
… thread them through the holes of the screw eyes
attaching all the yardsticks one underneath the other


last thing was to punch small stars out of brown kraft paper ~ clip them inside of the tiny clothespins, stuck on with hot glue 
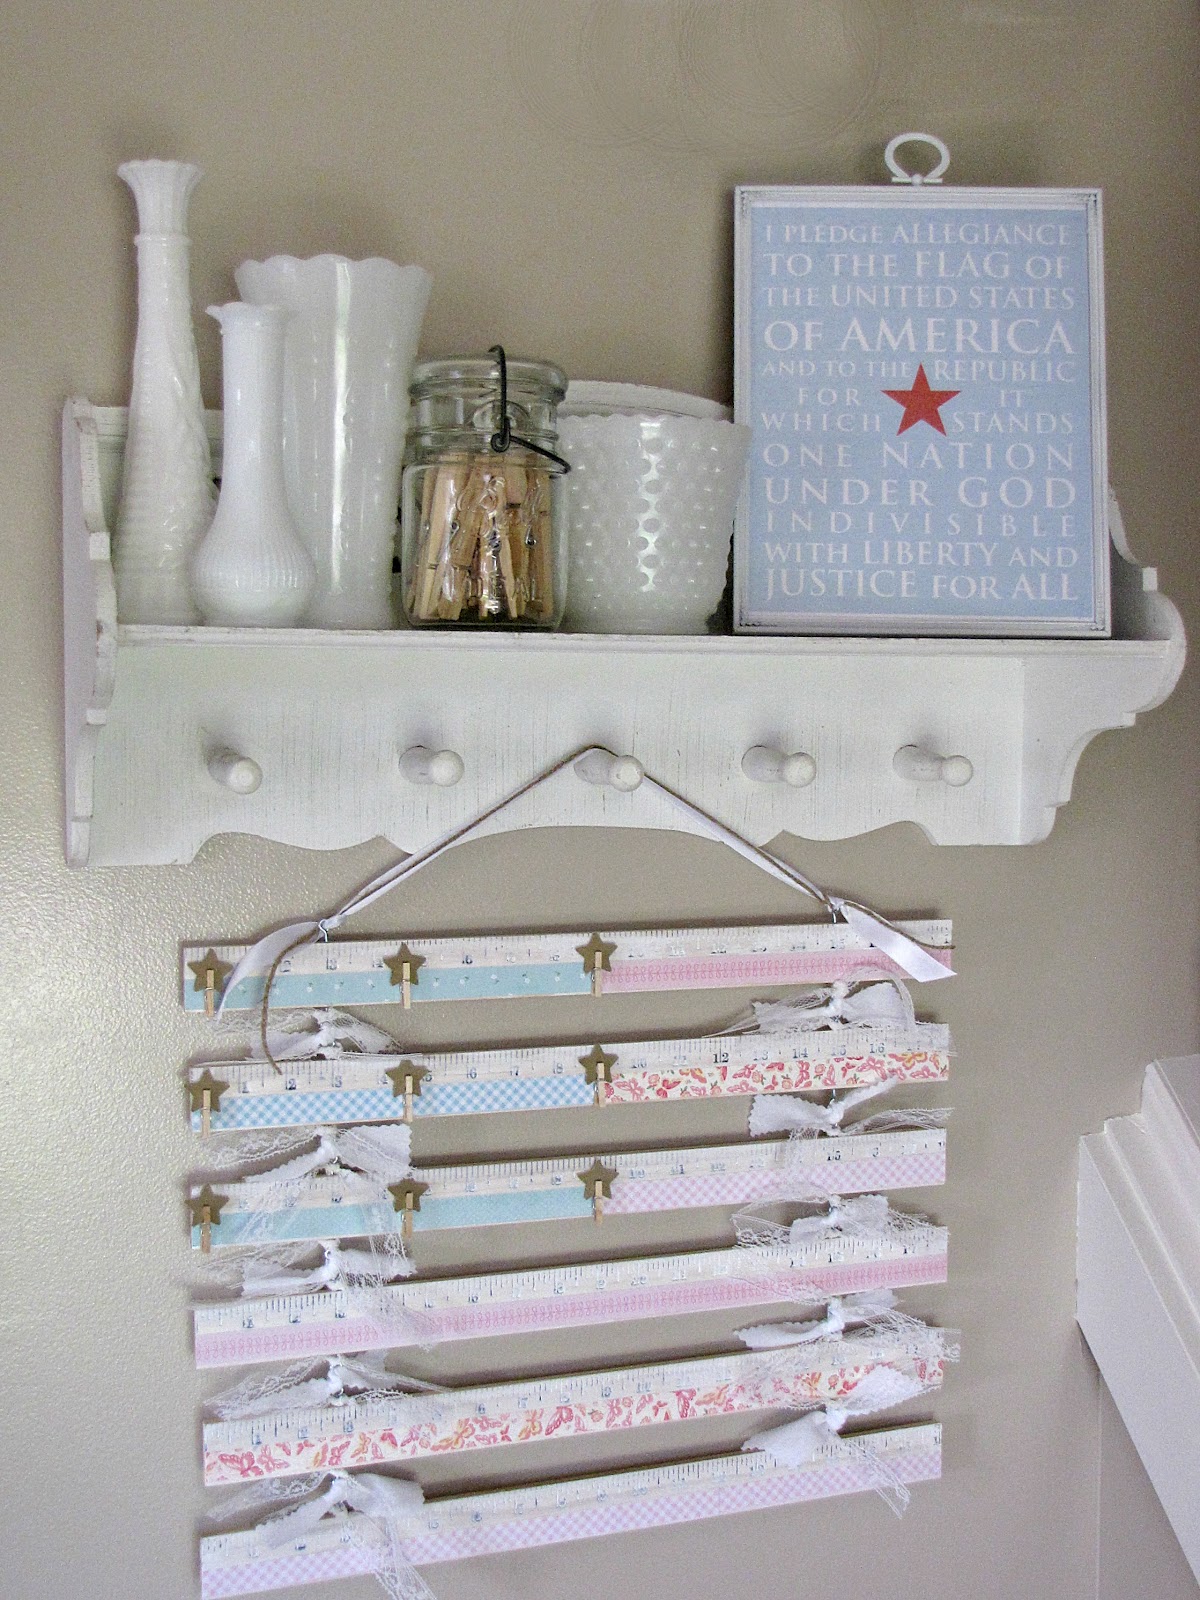

so pretty … no?!?!
i love this so much ♥
it’s hanging right inside my foyer 
with this little vignette shelf i got at a garage sale last weekend for $5 
(chipper chicken … any FOTB fans out there? heehee:)


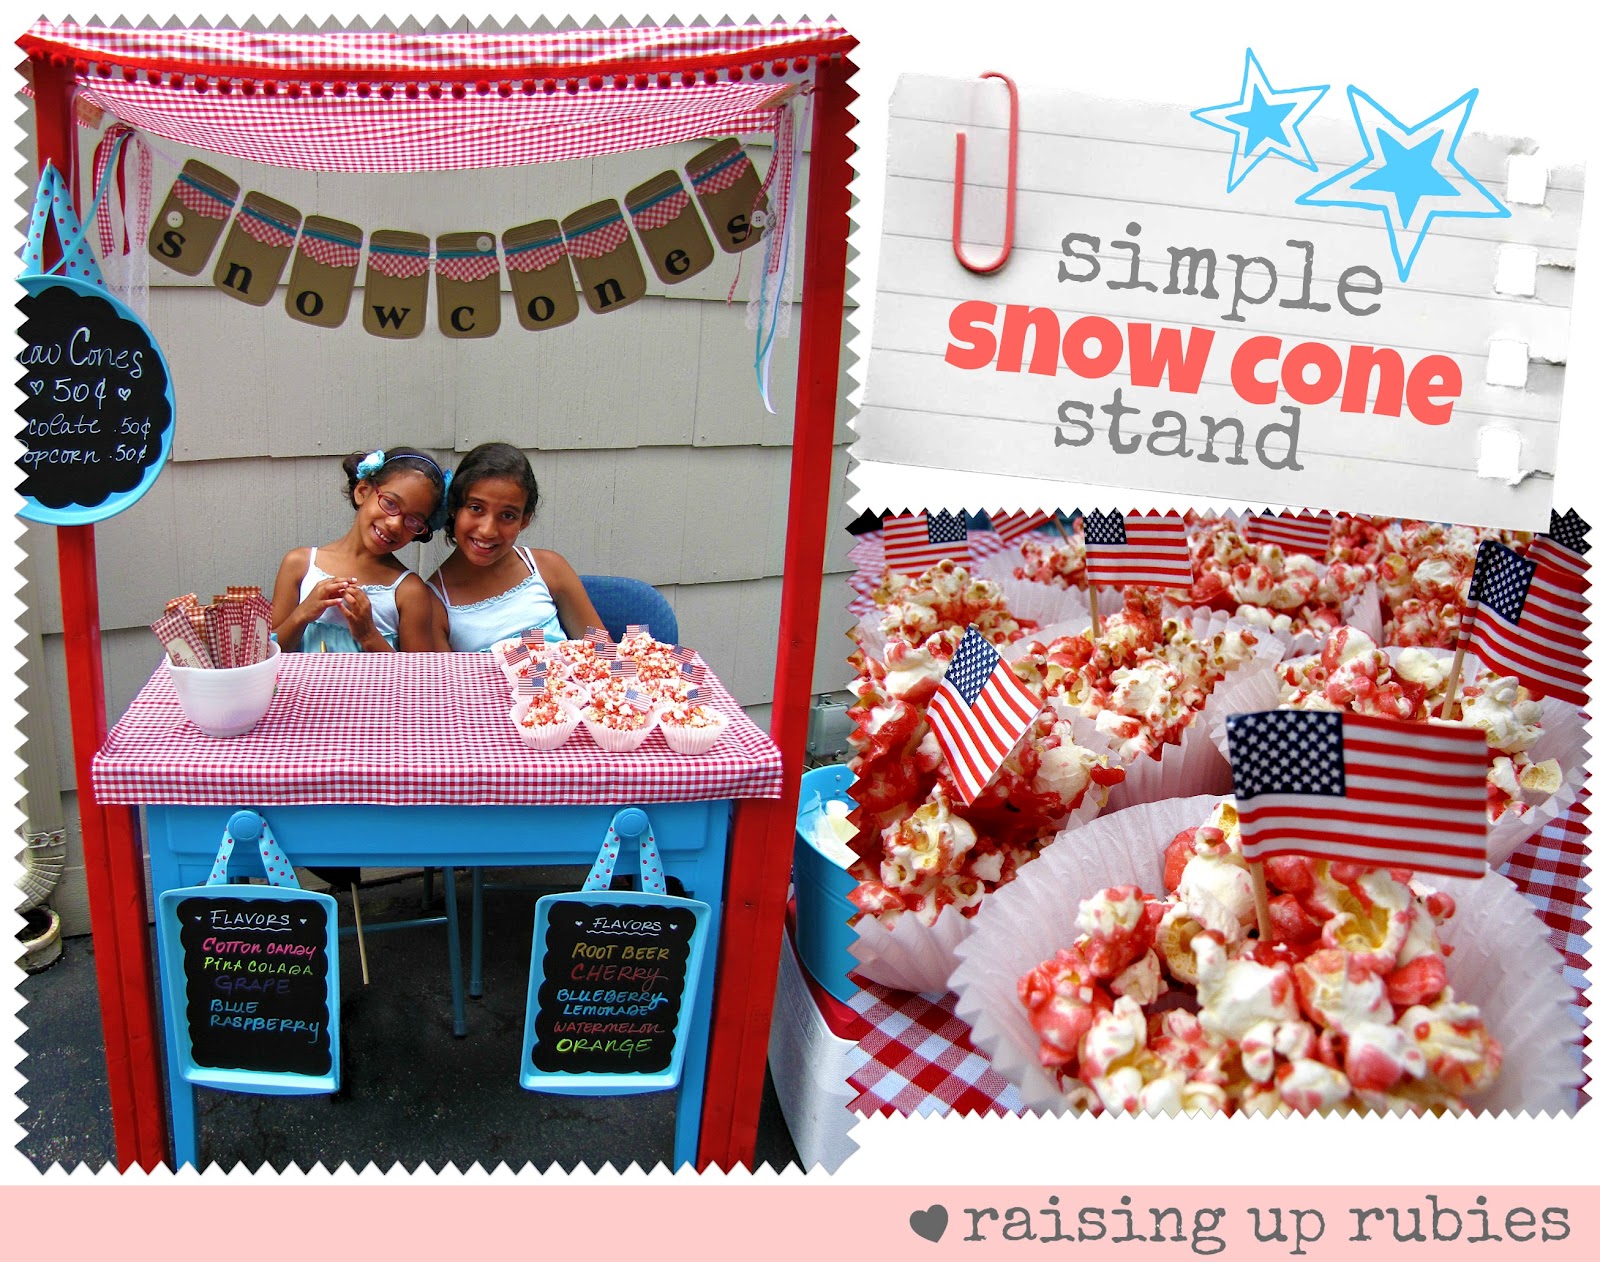
Happy 4th of July all !!
i’m going to enjoy my family and be thankful for our freedom and our country

Image 1
much loves ♥
sweet parties … ♥
Uncategorized

simple snow cone stand … ♥

hey all!
i wanted to share this project with you…
just in time for the holiday weekend and for summer!

one of the things on our summer list has always been to do a lemonade stand
my aunts have a garage sale every summer that gets quite a lot of traffic
so this year we set up shop
and instead of lemonade…we did snow cones!
i had all the supplies on hand already
 so it was easier than buying 40 lemons to make lemonade 🙂

now, we happen to have a lot of scrap lumber, craft supplies 
and numerous items waiting to be spray painted layin’ around
so if you’re not a sort-of garage sale stuff hoarder like me
…you might have to get a little creative with your supplies :):)
lemme give you a run-down of the stuff i used 
and how i jerry-rigged (is that a word?) everything together
spray paint some cookie sheets & old trays to use as menus
some chalkboard paint, clalkboard makers, ribbon and hot glue came in handy here too!


 the little blue table was a yard sale find…just waiting for something good 🙂
the red supports to hold the bunting & the little awning thing, was put together by the hubs
totally on the fly…2 pieces of 2×2 put together 
one piece to wedge underneath the lip of the table, the other was at the desired height 
with cup hooks screwed in at the top for the bunting

 this is where the “jerry” and the “rigged” came into play 🙂
(i take total responsibility for this part…my hubby is not a fan of either of those words 
…especially when put together 🙂 he’s a by the book kinda guy
…i’m a fly by the seat of my pants-let’s build a snow cone stand at midnight! kinda girl)
i cut both a piece of sturdy cardboard, long enough to go across the top of the stand,
and a piece of fabric that would cover the majority of the table top
then hot glued each end of the fabric to half of a yardstick
laid the fabric piece over the cardboard
and nailed both layers to the top of the wood pieces

(i warned you … jerry-rigged)


hopefully these pictures will help 🙂

 another cup hook for the chalkboard menu
some supplies…

and some snacks…


 according to my daughter…snacks are the source of all life force
with out them, we would be doomed
she’s even got a bag of cheez-its stashed in case of a snack emergency


the girls had such a fun time serving customers
and they made over $30!! 
which had them so excited…i think it will be something they do every summer
they had fun eating them too 🙂

i have another 4th of July project i want to do with you guys this week!
so maybe my kitchen pics are on hold 🙂
much love
sweet parties … ♥


Uncategorized

what a feature …♥

wow ♥ wow ♥ wow
I am so honored today!
 to have my craft space featured over at i heart organizing!
i have followed Jen’s blog for a loooong time 🙂 
and have gained a ton of inspiration from her super star organizing ideas…
go on over and check it out!
thanks Jen!!
oh! ps.! since you’re here check out my patriotic clothespin wreath tutorial ♥
with Kim over at Everything Etsy
it’s too. stinkin. fun.  !!!